
Bubbles are the reason most people are scared of wallpaper, and I was one of them. My first attempt — a single accent wall in my home office — ended up looking like bubble wrap in three places. I peeled the whole thing off, bought one more roll, and did it again with a completely different technique. The second wall was flawless. The difference came down to two things: proper wall prep and the way you smooth the paper onto the wall. This guide covers both, step by step.
Know Your Wallpaper Type First
The hanging technique depends on which of the three main types you're working with. Check the label before you start:
| Type | How it goes up | Difficulty | Repositioning |
|---|---|---|---|
| Paste-the-wall (non-woven) | Paste the wall, hang dry paper | Easiest | Excellent — slides on wet paste |
| Paste-the-paper (traditional) | Paste the back, book it, then hang | Moderate | Good for a few minutes |
| Peel-and-stick (self-adhesive) | Peel backing, stick to wall | Easy to start, hard to fix | Poor — resticking weakens adhesive |
If you're a first-timer, I strongly recommend paste-the-wall non-woven paper. It's the most forgiving by far: the paper doesn't stretch or tear when wet, and you can slide it around on the pasted wall to get the position perfect. My bubble disaster was traditional paste-the-paper. My redemption wall was paste-the-wall, and it went up in half the time.
Peel-and-stick sounds easiest but it's deceptive — once it grabs the wall, repositioning is difficult, and large panels are unwieldy. It's great for small areas like a powder room or a closet, less great for a full 12-foot wall.
Tools and Materials
- Wallpaper, plus one extra roll beyond your calculation (pattern matching eats paper)
- Paste (if not pre-pasted or peel-and-stick) — get the type your paper specifies
- Paste brush or 3/8-inch nap paint roller and tray
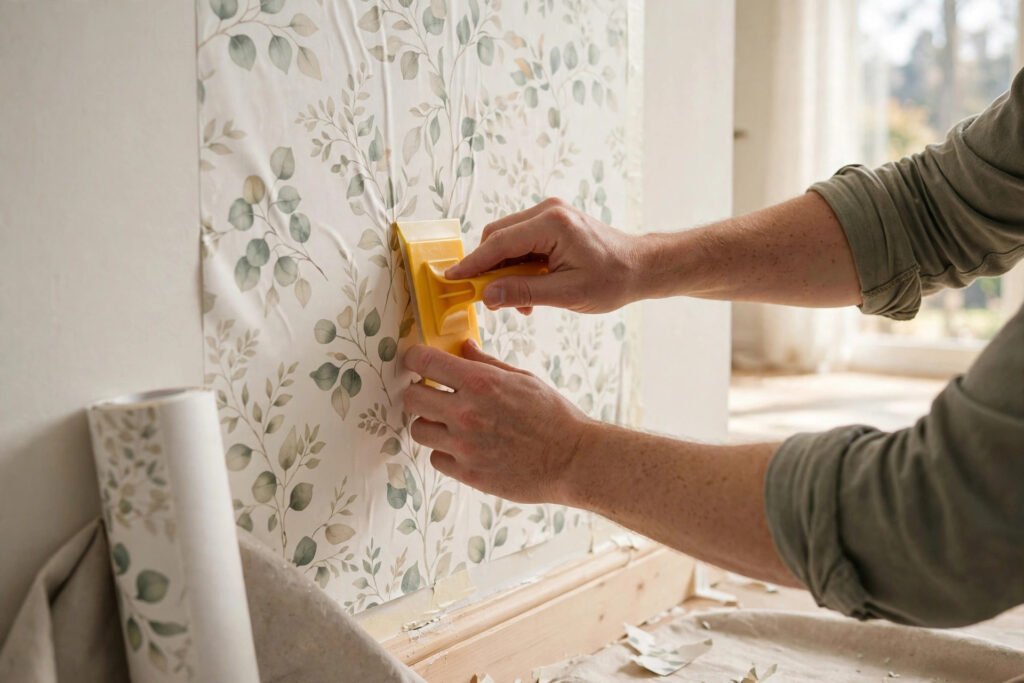
- Wallpaper smoothing brush or plastic smoother
- Seam roller (small rubber roller for seams)
- Sharp snap-blade utility knife with extra blades — change the blade every 2–3 cuts
- 6-foot level or plumb bob
- Tape measure, pencil, straightedge
- Step ladder, drop cloths, bucket of clean water, sponge
- Wallpaper primer/sealer (don't skip this — more below)
Step 1: Prep the Wall (This Is Where Bubbles Are Born)
Most bubbles aren't a hanging problem; they're a prep problem. Air and moisture trapped under the paper, or paste drying unevenly over a porous spot, creates bubbles days later.
- Remove old wallpaper completely. New paper over old paper is asking for bubbles and peeling. Score, steam or soak, and scrape.
- Fill and sand. Fill nail holes and dents with spackle, sand smooth with 120-grit, and wipe the dust off with a damp sponge.
- Prime with wallpaper primer. This is the step I skipped on my first wall. Bare drywall — especially fresh joint compound — absorbs paste unevenly. Wallpaper primer (sometimes called "size") seals the surface so the paste stays wet and workable, and it makes future removal dramatically easier. One coat, rolled on like paint, dried per the label.
- Mark your plumb line. Walls are never perfectly straight. Measure out from your starting corner by the width of your paper minus 1/2 inch, and draw a vertical plumb line with your level. Hang your first panel to this line, not to the corner.
Step 2: Cut Your Panels
Measure the wall height, add 4 inches (2 inches top and bottom for trimming), and cut your panels. If your paper has a pattern repeat, factor it in: unroll and cut so the pattern matches at the same height on every panel, which means some panels will waste the length of one full repeat. This is why you bought the extra roll.
Number the back of each panel lightly in pencil in hanging order. When you're three panels deep and tired, you'll be glad you did.
Step 3: Apply Paste (Paste-the-Wall Method)
Roll paste onto the wall for one panel width plus a couple of inches, from ceiling to floor. Apply it generously and evenly — thin spots dry first and cause bubbles. Don't paste three panels' worth at once; the paste will skin over before you get there. One panel at a time.
For paste-the-paper: paste the back of the panel evenly, then "book" it — fold the pasted sides together, paste to paste, and let it rest for the booking time on the label (usually 5–10 minutes). Booking relaxes the paper so it doesn't expand on the wall and form bubbles later. Skipping the booking time is a classic cause of delayed bubbling.
Step 4: Hang the First Panel
This panel sets the line for the whole wall, so take your time — mine took 30 minutes, and every panel after took about 10.
- Start at the ceiling, leaving 2 inches of excess to trim later.
- Align the edge of the panel with your plumb line (not the corner).
- Let the top stick, then let the panel fall naturally down the wall. Don't stretch it.
- Smooth from the center outward — this is the key move. Using your smoothing brush or plastic smoother, work from the middle of the panel toward the edges, pushing air out to the sides. Top to bottom, center to edges, in overlapping strokes.
- Never smooth from the edge inward — that traps air in the middle, which is exactly how you get bubbles.
Step 5: Smooth, Trim, and Roll Seams
After the panel is up and smoothed:
- Trim top and bottom. Press the paper into the corner with your smoother or a broad knife, and cut along it with a fresh snap-blade. Change blades often — a dull blade tears instead of cutting.
- Roll the seams. Run the seam roller lightly down each seam to bond the edges. Light pressure — pressing hard squeezes paste out and can stretch the paper, which later shrinks back and opens a gap.
- Wipe paste off the face. Damp sponge, clean water, gentle. Dried paste on the face of the paper leaves shiny spots.
Hang subsequent panels the same way, butting edges tightly together without overlapping. For patterned paper, match the pattern at eye level first, then let the top and bottom fall where they may.
Step 6: Deal With Outlets, Switches, and Corners
Turn off the breaker before working around outlets and switches. Hang the panel right over the fixture, then cut an X over it with your knife and trim around the opening, tucking the paper under the cover plate.
Inside corners: don't try to wrap a full panel around an inside corner — corners are never plumb, and the paper will wrinkle. Instead, measure the distance to the corner, add 1/2 inch, cut the panel lengthwise, hang it wrapping just 1/2 inch around the corner, then start the next wall with a fresh plumb line overlapping that 1/2 inch.
Fixing Bubbles After the Fact
If you still get a bubble (it happens), don't panic:
- Small bubble, paste still wet: lift the nearest edge and re-smooth from center outward.
- Small bubble, paste dry: slit the bubble with a sharp blade, inject a tiny amount of paste with a syringe or the tip of a glue bottle, press flat, and wipe clean.
- Large bubble or wrinkle: peel the panel back to the problem area while the paste is workable, reposition, and re-smooth. With paste-the-wall paper you can usually do this within 15–20 minutes.
Case Study: My Office Accent Wall, Take Two
Wall: 11 feet wide, 8 feet high, one window. Paste-the-wall non-woven paper, 21-inch wide panels.
Take one (paste-the-paper, no primer, rushed): 6 panels hung in 3 hours, 3 visible bubbles within 48 hours, one seam that opened up. Peeled it all off — two more hours.
Take two (paste-the-wall, primed wall, plumb line, center-out smoothing): 6 panels in 2.5 hours including prep, zero bubbles, seams invisible. Total extra cost of doing it right: one gallon of wallpaper primer ($22) and one extra roll of paper ($45) that I ended up not even needing.
The lesson I keep relearning in DIY: prep is the project. The actual hanging is the reward.
Common Mistakes
- Skipping the primer. Bare drywall drinks paste unevenly, and you'll fight bubbles the whole wall. Prime every time.
- Smoothing edge-to-center. Air gets trapped in the middle with nowhere to go. Always center-outward.
- Hanging to the corner instead of a plumb line. Corners lean. Your first panel follows the lean, and every panel after compounds it.
- Dull blades. Tearing instead of cutting leaves ragged edges that lift. Snap off a fresh blade every couple of cuts — that's what they're designed for.
- Overworking peel-and-stick. Every reposition weakens the adhesive. With peel-and-stick, commit: peel a foot at a time, smooth as you go, and don't pull it back up more than once.
- Butting seams with stretched paper. If you pulled the panel sideways to force alignment, it will shrink back as it dries and open a gap at the seam. Slide, don't stretch.
FAQ
Why does my wallpaper keep bubbling?
The most common causes are an unprimed wall absorbing paste unevenly, smoothing from the edges inward (trapping air), or skipping the booking time on paste-the-paper products. Small bubbles sometimes disappear as the paper dries and tightens — wait 48 hours before deciding a bubble is permanent.
Can I hang wallpaper over painted walls?
Yes, if the paint is in good condition — clean, smooth, and well-adhered. Lightly sand glossy paint so the primer and paste can grip, then apply wallpaper primer over the paint. Don't hang over flaking or peeling paint.
How long does wallpaper paste take to dry?
The paper is usually workable for 15–30 minutes after hanging, depending on temperature and humidity. Full cure takes 24–48 hours. Keep the room at a moderate temperature with no direct blasts from heaters or fans, which dry the edges too fast and cause curling.
Is peel-and-stick wallpaper really easier?
For small, simple areas, yes. For full walls, it's often harder than paste-the-wall because large adhesive panels are unwieldy and unforgiving of repositioning. Beginners doing a whole room usually have better luck with paste-the-wall non-woven paper.
Can I wallpaper just one wall?
Absolutely — accent walls are the most popular wallpaper project for a reason. One wall means less pattern matching, less paper, and a much shorter learning curve. It's also the perfect low-risk way to try wallpaper for the first time.
About the Author
Dave Collins is a hands-on DIY enthusiast who has spent the past 15 years renovating three of his own homes. He learned most of what he knows by making mistakes first, then asking pros what he did wrong. On this site he writes practical, numbers-first guides so you can skip the mistakes and get it right the first time.