
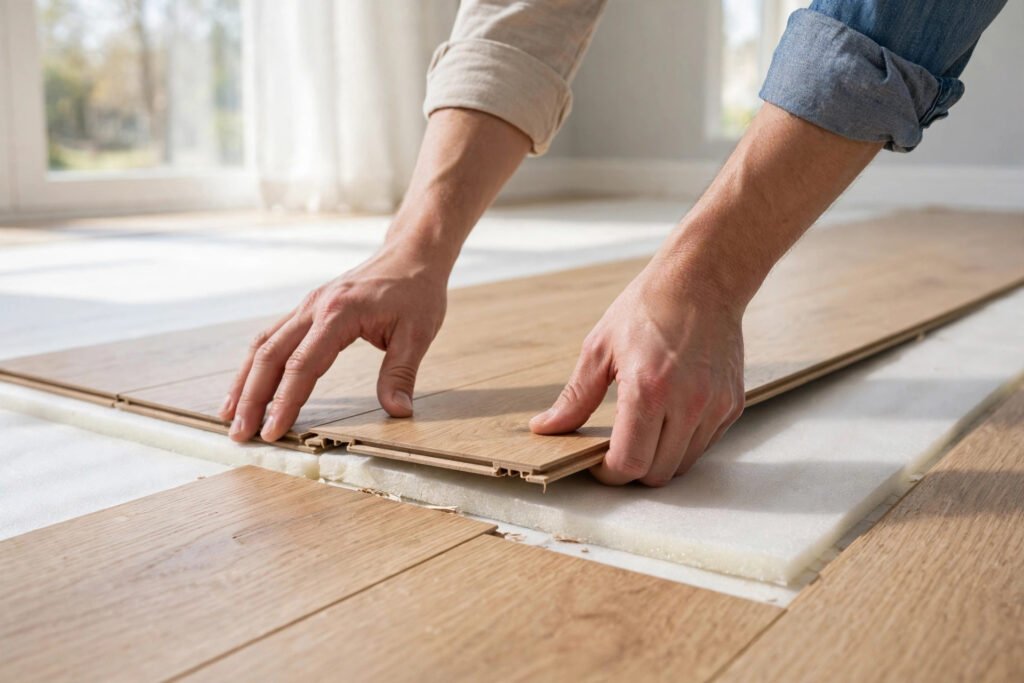
I've installed laminate flooring in three rooms of my own houses now, and I can tell you the truth nobody put on the box: the first room took me a full weekend and looked a little rough around the closet. The third room took one day and looks like a pro did it. The difference wasn't talent. It was knowing how the planks actually click together and not skipping the boring prep work.
This guide is everything I wish someone had told me before I tore up my first carpet. Real measurements, real costs, and the exact order of operations that works.
What You're Getting Into
Laminate flooring is a floating floor. That means the planks lock to each other but are not attached to the subfloor at all. They sit on a foam underlayment and expand and contract with temperature and humidity, which is why the expansion gap around the edges matters so much. Skip it and your floor will buckle. I know because I learned this in a hallway in 2019.
Before you buy anything, decide whether laminate is actually the right material for your room. Here's how it stacks up against the two alternatives most people consider:
| Feature | Laminate | Luxury Vinyl Plank (LVP) | Engineered Hardwood |
|---|---|---|---|
| Cost per sq ft (material) | $1.50–$3.50 | $2.50–$5.00 | $5.00–$12.00 |
| Water resistance | Low — swells at joints | High — handles spills | Low–moderate |
| Scratch resistance | Excellent | Good | Fair |
| Install difficulty | Easy (click-lock) | Easy (click-lock or glue) | Moderate |
| Lifespan | 15–25 years | 15–25 years | 25–50 years |
| Best for | Bedrooms, living rooms, offices | Bathrooms, kitchens, basements | Living areas on a bigger budget |
My rule: if the room can flood or regularly gets standing water, don't use laminate. I put LVP in my laundry room and laminate in the bedrooms. Both were the right call.
Step 1: Measure the Room and Buy the Right Amount
This is where people mess up first. Measure the length and width of the room in feet, multiply, and that's your square footage. Then add 10% for cutting waste. If the room has an angled wall or lots of doorways, add 15%.
Here's my actual bedroom as a worked example:
- Room: 12 ft × 15 ft = 180 sq ft
- Waste factor: 180 × 1.10 = 198 sq ft
- I bought 200 sq ft of flooring
Laminate is sold in boxes that typically cover 18–22 sq ft each. My boxes were 20.1 sq ft, so 200 ÷ 20.1 = 9.95, meaning I bought 10 boxes. Always round up, and buy one extra box beyond the math if your store allows returns. An unopened box can go back; a half-finished floor at 8 p.m. on a Sunday with no spare planks is a disaster.
Also acclimate the planks: stack the unopened boxes flat in the room for at least 48 hours before installing. I skipped this once in a garage-turned-office and the planks expanded just enough after installation to pop a seam open. Never again.
Step 2: Gather Tools and Materials
You need less than you'd think:
- Laminate planks and foam underlayment (some planks have it pre-attached — check)
- Tape measure, pencil, speed square
- Laminate cutter or a jigsaw with a fine-tooth blade (I prefer a manual laminate cutter; it's quieter and makes cleaner cuts)
- Tapping block, pull bar, and spacers (sold as a $20–$30 install kit — buy it)
- Rubber mallet
- Utility knife and straightedge
- Knee pads. Seriously. My knees filed a complaint after room one.
Step 3: Prepare the Subfloor
Remove the old flooring and the baseboards. Laminate needs a subfloor that's flat within 3/16 inch over any 10-foot span. Check it with a long level or a straight 2×4.
Small dips in concrete or plywood can be fixed with floor patch or self-leveling compound. High spots on plywood can be sanded down. On my second room I found a 1/4-inch hump where two subfloor sheets met and ignored it. The laminate clicked over it fine at first, then the locking edge cracked six months later under a bookshelf. Fix the hump.
Sweep and vacuum thoroughly. A single staple or pebble under the underlayment will telegraph a bump into the floor.
Step 4: Lay the Underlayment
Roll the foam underlayment out perpendicular to the direction you'll lay the planks, butt the seams tight, and tape them. Run it about 2 inches up the wall and trim later, or leave it flush — either works since baseboard covers the edge.
If your planks come with attached underlayment, skip this. Do not double up underlayment; it makes the floor too soft and stresses the click joints.
Step 5: Choose Your Starting Wall and Direction
Lay planks parallel to the longest wall or parallel to the main light source (window). Long rooms look longer when planks run lengthwise. I laid my first room perpendicular to the long wall because I didn't know better, and it made a 15-foot room feel choppy.
Start in a left corner with the tongue side facing the wall. Put 1/4-inch spacers between the plank and the wall. This gap gets covered by baseboard later and gives the floor room to expand.
Step 6: Click the Planks Together
This is the satisfying part. Most modern laminate uses an angle-click system:
- Hold the new plank at about a 20–30 degree angle to the plank already on the floor.
- Slide the long tongue into the long groove of the previous row.
- Lower it flat. You'll feel it seat.
- Tap the end joint with the tapping block and mallet to lock the short ends together.
Stagger your end joints by at least 12 inches from row to row — never line them up like a brick wall's grout lines… actually, brick pattern is what you want, but random stagger looks best. Use the cutoff from the end of one row to start the next row; that keeps waste down and joints naturally staggered. Cutoffs shorter than 8 inches should be tossed.
Step 7: Cut the Last Plank of Each Row
Measure the remaining space, subtract 1/4 inch for the expansion gap, and cut. For straight cuts, my manual laminate cutter handles it in one snap. For notches around door jambs or vents, a jigsaw works.
Speaking of door jambs: undercut them. Lay a scrap plank upside down next to the jamb and cut the jamb with a handsaw so the flooring slides underneath. It looks infinitely better than trying to cut the plank around the trim.
Step 8: Finish the Final Row
The last row almost always needs to be ripped lengthwise. Measure the gap at several points along the wall (walls are never straight), take the smallest measurement, subtract 1/4 inch, and rip the planks on a table saw or with a circular saw and a straightedge guide. Use the pull bar to snug this row tight — your fingers won't fit back there.
Step 9: Transitions, Baseboards, and the Last 10%
Remove the spacers. Install transition strips at doorways where laminate meets another floor type — T-molding for same-height floors, reducers where heights differ. Reinstall baseboards, or install new ones if the old ones were beat up. Caulk the top edge of the baseboard for a finished look.
Wait 24 hours before moving heavy furniture back in, and put felt pads under everything. My dining table legs scratched my first laminate floor in a week because I skipped the pads.
Case Study: My 12×15 Bedroom, Real Numbers
Here's the full accounting from my third room, the one that went right:
| Item | Cost |
|---|---|
| 10 boxes laminate (200 sq ft @ $2.19/sq ft) | $438 |
| Underlayment (pre-attached, $0) | $0 |
| Install kit (spacers, tapping block, pull bar) | $25 |
| Laminate cutter | $49 |
| Transitions and quarter-round | $38 |
| Total | $550 |
Time: one full Saturday, about 9 hours including a lunch break and one trip back to the store for more transition strips. A flooring contractor quoted me $1,400 for the same room. That's $850 I kept by doing it myself — minus the cost of knee pads I should have bought first.
Common Mistakes
- Skipping the expansion gap. The floor needs 1/4 inch (up to 3/8 inch in very humid climates) around every wall, pipe, and fixed object. Without it, summer humidity makes the floor expand and buckle. This is the number one laminate failure I see in DIY forums.
- Not acclimating the planks. 48 hours in the room, flat, unopened. Wood-based products move; let them settle before you lock them together.
- Installing over an uneven subfloor. Anything over 3/16 inch in 10 feet will eventually crack a locking edge. Fix it before the first plank goes down.
- Lining up the end joints. Stagger by 12 inches minimum. Aligned joints look amateur and weaken the floor.
- Hammering the planks directly. Always use the tapping block. A mallet on the plank edge crushes the click profile and the joint never locks right.
- Forgetting the moisture barrier on concrete. If you're over a concrete slab, use underlayment with a built-in vapor barrier (or lay 6-mil poly first). Concrete wicks moisture and laminate hates it.
FAQ
How long does it take to install laminate flooring in one room?
A single bedroom (150–200 sq ft) takes most DIYers one full day once the subfloor is prepped. Your first room will take longer — mine took a weekend. Add a half day if you need to remove old flooring and fix subfloor issues.
Can I install laminate flooring over carpet?
No. Carpet is too soft and uneven; the click joints will flex and break. Pull the carpet and pad out completely and install over the hard subfloor underneath.
Do I need to remove baseboards before installing laminate?
You don't strictly have to — you can install quarter-round molding to cover the expansion gap against existing baseboards. But removing and reinstalling the baseboards looks much cleaner, and it's only an extra hour or two.
Which direction should laminate flooring run?
Parallel to the longest wall or the main light source. In a hallway, run it lengthwise down the hall. Running planks across a narrow room makes it feel even narrower.
Can laminate flooring go in a kitchen?
It can, but it's risky around sinks, dishwashers, and ice makers. One slow leak can ruin the floor. If you do it, seal the perimeter with silicone and wipe up water immediately. For full peace of mind, use luxury vinyl plank in kitchens instead.
About the Author
Dave Collins is a hands-on DIY enthusiast who has spent the past 15 years renovating three of his own homes. He learned most of what he knows by making mistakes first, then asking pros what he did wrong. On this site he writes practical, numbers-first guides so you can skip the mistakes and get it right the first time.