
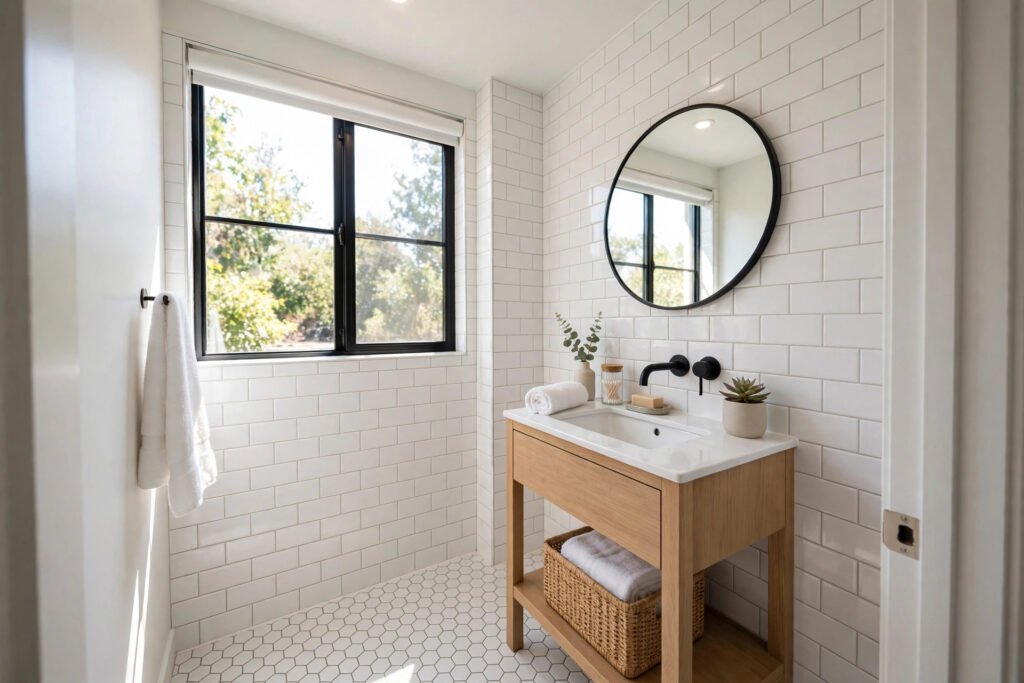
Our hall bathroom was 5×8 feet of 1980s sadness: a stained fiberglass tub, a vanity with swollen particle-board doors, and wallpaper that had started peeling in the steam zones. A contractor quoted me $14,000. I did it myself for $3,412. It took six weekends, one very patient spouse, and a willingness to learn plumbing basics from library books and long phone calls with a retired plumber friend. Here's the full playbook — real numbers, real sequence, real mistakes.
What a Small Bathroom Remodel Actually Costs
Let's set expectations. A small bathroom (40–60 sq ft) remodel falls into three tiers:
| Tier | Cost range | What you get |
|---|---|---|
| DIY cosmetic refresh | $800–$2,000 | Paint, new fixtures, hardware, vanity refinish — no plumbing or tile changes |
| DIY full renovation | $3,000–$5,000 | New vanity, toilet, tile, tub refinish or surround, lighting — you do the labor |
| Contractor full renovation | $10,000–$20,000+ | Same scope as DIY full, but with professional labor |
Labor is typically 40–60% of a contractor quote. If you can do the demolition, tiling, painting, and fixture installation yourself — and hire out only what's truly beyond you — you land in that $3,000–$5,000 window.
The Full $3,500 Budget Breakdown
Here's my actual budget, line by line, from the hall bath project. Your numbers will vary by region and choices, but this shows where the money really goes.
| Category | Item | Cost |
|---|---|---|
| Demolition | Dumpster bag + disposal fees | $85 |
| Demolition | Pry bars, utility blades, misc | $25 |
| Plumbing rough-in | PEX tubing, fittings, shutoff valves | $140 |
| Tub | Professional tub refinishing (hired out) | $450 |
| Tile — floor | 45 sq ft porcelain tile ($2.80/sq ft) | $126 |
| Tile — shower walls | 70 sq ft ceramic subway tile ($1.90/sq ft) | $133 |
| Tile supplies | Thinset, grout, spacers, backer board | $165 |
| Vanity | 30" vanity with top (floor model, 40% off) | $280 |
| Vanity faucet | Single-handle faucet | $75 |
| Toilet | 1.28 gpf two-piece toilet | $190 |
| Toilet install kit | Wax ring, supply line, bolts | $18 |
| Lighting | Vanity light fixture | $85 |
| Lighting | Exhaust fan (80 CFM, quiet model) | $120 |
| Electrical | GFCI outlet, wire, boxes | $65 |
| Paint | Bathroom paint (mildew-resistant) + primer | $70 |
| Mirror + medicine cabinet | 24" recessed medicine cabinet | $110 |
| Accessories | Towel bars, hooks, toilet paper holder | $60 |
| Showerhead + trim | Showerhead, arm, valve trim kit | $130 |
| Caulk + sealants | Silicone, painters caulk | $30 |
| Contingency (10%) | For the surprises (there are always surprises) | $320 |
| Total | $3,377 |
I came in $123 under my $3,500 target. The contingency covered a rotted subfloor section under the toilet ($60 in plywood and screws) and a second trip for extra grout.
Where to Save vs. Where to Spend
This is the decision that makes or breaks a budget reno. Save in the wrong place and you'll redo it in three years.
Save money here
- Tile. Porcelain and ceramic tile from a big-box store at $1.50–$3.00/sq ft looks 90% as good as $12/sq ft designer tile once it's grouted. I used $1.90 subway tile in the shower and people assume it cost four times that.
- Vanity. A floor-model or clearance vanity saves 30–50%. The one I bought was $280 marked down from $470 because of a tiny scratch on the side panel nobody sees.
- Faucets and hardware. Mid-range brands ($60–$100) perform nearly identically to premium ones. Avoid the absolute cheapest — $25 faucets leak within a year.
- Mirror. A simple framed mirror or medicine cabinet from a home store beats a custom mirror at triple the price.
- Demolition. Doing your own demo saves $500–$1,000 in labor. It's the easiest part of the job to DIY.
Spend money here
- Exhaust fan. This is the one I see people cheap out on, and it's the one that prevents mold. Get a quiet one (under 1.0 sones) rated for your bathroom size — you need roughly 1 CFM per square foot. A 50 sq ft bath needs a 50 CFM fan minimum; I installed 80 CFM. If it's loud, nobody turns it on, and then it's worthless.
- Waterproofing behind tile. Cement backer board plus a waterproofing membrane (like RedGard, $50/gallon) in the shower. Water damage behind tile is the most expensive bathroom failure there is.
- Shutoff valves and supply lines. Replace every valve and flexible supply line while the walls are open. A $8 valve now prevents a $2,000 water damage claim later.
- Toilet. A decent $190 toilet flushes better and clogs less than a $99 special. Look for MaP scores (Maximum Performance testing) of 800+ grams.
- Tub refinishing vs. replacement. Refinishing costs $400–$600; replacing a tub costs $2,000+ once you factor in plumbing, tile repair, and disposal. If the tub is structurally sound, refinish it.
The Renovation Sequence (In Order)
Order matters. Do things out of sequence and you'll damage finished work.
- Plan and measure. Measure everything twice. Draw the layout on graph paper. Decide fixture locations before you buy anything — moving a toilet drain after the fact costs thousands.
- Order materials. Have tile, vanity, toilet, and fixtures on site before demo starts. Backorders are the number one cause of month-long bathroom projects.
- Shut off water and power. Turn off the water to the bathroom (or the whole house) and flip the breaker. Test that both are actually off. Keep a bucket and towels handy for water left in the lines.
- Demolish. Remove the vanity, toilet, mirror, and accessories first. Then tile and drywall. Work top to bottom. Wear a respirator — old bathrooms have decades of dust, and pre-1978 homes may have lead paint (test before disturbing it).
- Rough plumbing and electrical. Move or add supply lines, drains, and vent pipes. Run new electrical for the fan, light, and GFCI outlet. This is the stage to hire a plumber or electrician for if you're not confident — a few hundred dollars here is cheap insurance.
- Repair subfloor and framing. Fix any rot, sister any weak joists, add blocking for grab bars or heavy fixtures.
- Install cement backer board and waterproofing. Backer board in all wet areas, moisture-resistant drywall (green or purple board) on other walls.
- Tile. Floors first, then walls. Let thinset cure fully before grouting (usually 24 hours).
- Paint. After tile, before fixtures go in.
- Install fixtures. Vanity, toilet, faucet, shower trim, light, fan, mirror, accessories — in roughly that order.
- Caulk everything. Silicone caulk at every tub/tile, tile/floor, and fixture junction. This is your last line of defense against water.
Tiling a Small Bathroom: Realistic Expectations
Tiling is the skill that intimidates most first-timers, and honestly it's the skill most worth learning — tile labor alone runs $8–$15 per square foot installed.
My shower was 70 sq ft of wall tile. My first wall took me 6 hours and looked slightly wavy. By the third wall I was laying tile at a reasonable pace and the lines were straight. Total tiling time: about 3 weekends including floor.
Tips that actually helped me:
- Rent a wet saw ($50/day) rather than struggling with a score-and-snap cutter on porcelain. Worth every penny.
- Use a tile leveling system ($20 for clips). These eliminated the lippage that made my first wall look amateur.
- Mix thinset in small batches. It starts setting in about 30 minutes. I wasted two full batches learning this.
- Buy 15% extra tile. Breakage, bad cuts, and future repairs. You'll use it.
Ventilation: The Unsexy Part That Matters Most
Small bathrooms generate enormous moisture in a tiny space. Without proper ventilation, your beautiful renovation grows mold within two years. The rules:
- Fan rated at minimum 1 CFM per square foot of bathroom (50 sq ft = 50 CFM minimum).
- Vent the fan outside — through the roof or a gable wall. Venting into the attic just moves the mold problem upstairs.
- Run the fan during showers and 20–30 minutes after. A humidity-sensing switch ($30) automates this.
- Use mildew-resistant paint (look for "bathroom paint" on the label) on walls and ceiling.
My Three Biggest Mistakes
Mistake 1: Not ordering everything upfront. I started demo before the vanity arrived. It was backordered six weeks. For six weeks we had a gutted bathroom and no vanity — brushing teeth at the kitchen sink. Order everything, confirm delivery dates, then start demo.
Mistake 2: Skipping the waterproofing membrane on the first shower wall. I figured cement backer board was enough. A plumber friend set me straight: backer board is not waterproof, it's just water-resistant. I bought the membrane and did the remaining walls properly, then went back and coated the first wall too. An extra $50 and an afternoon — cheap compared to tearing out failed tile in five years.
Mistake 3: Setting the toilet on an unlevel flange. The flange sat 1/4 inch below the finished tile, and I used a standard wax ring. It sealed — barely — but I lay awake worrying about it for a month. I eventually pulled the toilet and installed a flange extender and an extra-thick wax ring. Do it right the first time: the flange should sit 1/4 inch above the finished floor.
Permits: Don't Skip This Section
Most municipalities require permits for plumbing and electrical changes, even in a DIY renovation. Cosmetic work (paint, tile, fixture swaps in the same location) usually doesn't need one. Moving a drain, adding a circuit, or changing a vent stack almost certainly does. A permit costs $50–$200 and the inspection catches mistakes that could cost you far more. Call your local building department and ask — it takes five minutes.
Common Mistakes
- Starting demo before materials arrive. Backorders turn 3-week projects into 3-month projects. Everything on site first.
- Cheap exhaust fan or venting into the attic. Mold doesn't care how nice your tile looks. Vent outside, size the fan properly.
- No waterproofing behind shower tile. Backer board alone is not waterproof. Use a membrane.
- Ignoring the subfloor. Soft spots around the toilet or tub mean rot. Fix it while everything's open — it's a $50 repair now versus a $1,500 repair later.
- Too-small vanity for the plumbing. Measure your drain and supply locations before buying a vanity. A beautiful vanity that doesn't clear the P-trap is a very expensive mistake.
- Forgetting shutoff valves. Every fixture gets its own shutoff valve. Future-you will be grateful during the next repair.
- Grout without sealing (for cement grout). Cement-based grout absorbs water and stains. Seal it after curing, or use epoxy grout in the shower.
FAQ
How much does a small bathroom remodel cost in 2026? A DIY renovation of a 5×8 bathroom typically runs $3,000–$5,000 in materials. Hiring a contractor for the same scope usually costs $10,000–$20,000, with labor making up roughly half the total.
Can I renovate a bathroom myself with no experience? Yes for demolition, tiling, painting, and installing fixtures — these are learnable skills. Consider hiring a licensed plumber or electrician for rough-in work involving drain lines, vent stacks, or new circuits if you're unsure. There's no shame in a hybrid approach.
How long does a DIY bathroom remodel take? Working weekends, expect 4–8 weeks for a full renovation. A cosmetic refresh (paint, fixtures, no tile) can be done in a long weekend. Material delays are the biggest schedule risk — order everything before demo.
Should I refinish or replace my bathtub? If the tub is structurally sound with no cracks, professional refinishing ($400–$600) gives excellent results at a fraction of replacement cost ($2,000+ with plumbing and tile work). DIY refinishing kits exist but don't last as long as professional spray-applied coatings.
What's the best flooring for a small bathroom? Porcelain tile is the best all-around choice — waterproof, durable, and available from $1.50/sq ft. Avoid wood, laminate, and carpet in bathrooms. Luxury vinyl plank rated for wet areas is a good budget alternative at $2–$4/sq ft.
About the Author
Dave Collins is a hands-on DIY enthusiast who has spent the past 15 years renovating three of his own homes. He learned most of what he knows by making mistakes first, then asking pros what he did wrong. On this site he writes practical, numbers-first guides so you can skip the mistakes and get it right the first time.