
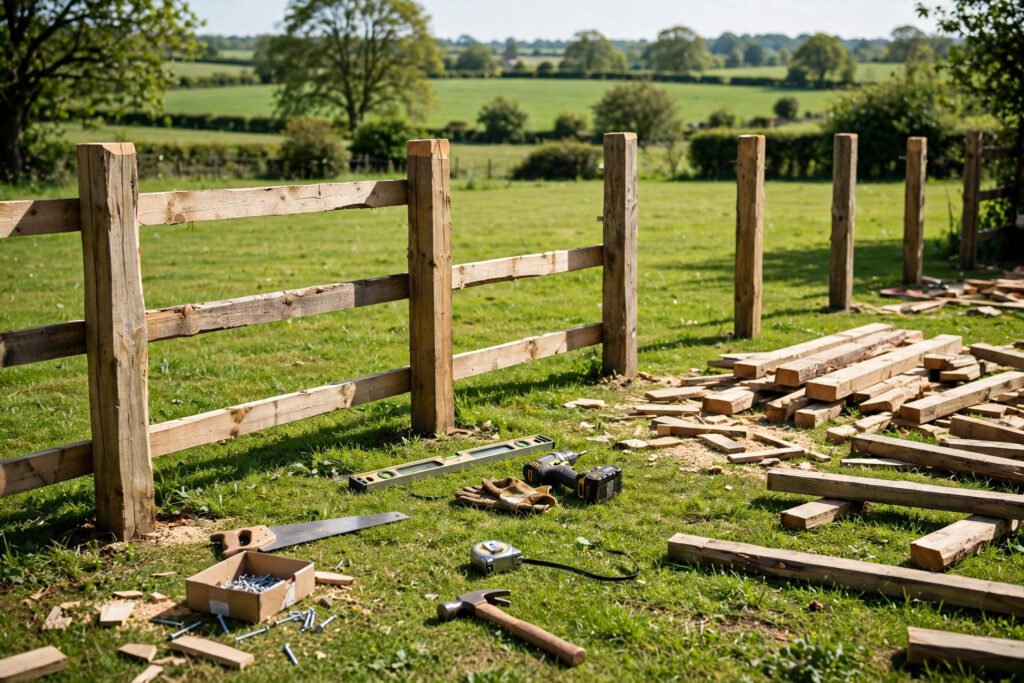
I built my first garden fence in 2019 — 100 linear feet of cedar pickets around my vegetable garden — and I made just about every mistake in the book. I set posts 10 feet apart to save money (they sagged within two years), I buried the posts directly in soil without concrete (two of them rotted at grade by year four), and I underestimated materials by 20% and made three extra trips to the lumber yard.
The second fence I built, in 2023, is still dead straight. This guide is everything I learned: what materials cost right now, how to calculate exactly what you need, and how to build a fence that lasts 15+ years instead of 5.
What Does a Garden Fence Cost?
For a standard 4-foot-tall garden fence (tall enough to define the space and discourage rabbits, not a privacy fence), here are realistic 2026 numbers for 100 linear feet, DIY:
| Material | DIY Cost (100 ft) | Notes |
|---|---|---|
| Pressure-treated pine pickets + rails | $450–$650 | Cheapest option, 10–15 yr life |
| Cedar pickets + PT posts/rails | $800–$1,100 | Best value, 15–20 yr life |
| Vinyl panels | $1,500–$2,200 | Highest upfront, lowest maintenance |
| Metal (welded wire + wood frame) | $600–$900 | Great for vegetable gardens |
| Pro installation (any material) | Add $15–$35 per linear foot | $1,500–$3,500 extra for 100 ft |
Hiring a contractor roughly doubles or triples the project cost. A 100-foot cedar garden fence that costs me about $950 in materials would run $2,500–$3,500 professionally installed. Fencing is one of the highest-markup DIY projects there is — the work is straightforward, it's just labor-intensive, and that's exactly what you're paying a pro for.
My recommendation for most people: cedar pickets on pressure-treated posts and rails. Cedar resists rot and insects naturally, looks great without stain, and the cost premium over treated pine (about 40–60% more) buys you roughly double the lifespan.
Materials: The Complete Shopping List
Here's the exact material math for 100 linear feet of 4-foot cedar picket fence. Fence posts go every 6–8 feet — I use 8-foot spacing for garden fences (6-foot spacing is stronger and standard for 6-foot privacy fences, but 8 feet is fine for a 4-foot garden fence and saves you 4+ posts).
Posts: 100 ÷ 8 = 12.5, so 13 posts, plus 1 extra for the gate if you're building one = 14 posts. Use 4×4 pressure-treated posts, 6 feet long (for a 4-foot fence, bury 2 feet). Cost: about $12–$16 each → $170–$225.
Rails: 2 horizontal rails per 8-foot section, 13 sections = 26 rails. Use 2×4 pressure-treated, 8 feet long. Cost: about $6–$9 each → $155–$235.
Pickets: For a 4-foot fence with standard 5.5-inch-wide pickets and a small gap: each 8-foot section needs about 15 pickets. 13 sections × 15 = 195 pickets, plus 10% overage = ~215 pickets. Cedar pickets (5/8 x 5.5 in x 4 ft) run $3.50–$5.00 each → $750–$1,075. This is the big-ticket item — pickets are typically 60–70% of the material cost.
Concrete: One 50-lb bag per post (dry-set method, described below) = 14 bags at $5–$7 → $70–$100.
Fasteners: 3-inch exterior deck screws or galvanized ring-shank nails, about 5 lbs. $25–$40. Use coated or stainless fasteners with cedar — plain steel reacts with cedar's tannins and leaves black streaks. I learned this on a cedar planter box before I ever built a fence.
Gate hardware (if applicable): hinges, latch, and a diagonal brace kit, $30–$60.
Total: roughly $950–$1,200 for 100 feet of cedar garden fence, DIY. Add a gate and you're at $1,000–$1,300.
Material Comparison: Which Fence for a Garden?
| Material | Cost per Linear Foot (DIY) | Lifespan | Maintenance | Best For |
|---|---|---|---|---|
| Pressure-treated pine | $4.50–$6.50 | 10–15 years | Stain every 2–3 years | Tight budgets |
| Cedar | $8–$11 | 15–20 years | Optional stain; weathers to gray | Best all-around value |
| Vinyl | $15–$22 | 20–30 years | Wash annually | Zero-maintenance priority |
| Welded wire + wood posts | $6–$9 | 15–20 years | Minimal | Vegetable gardens, keeping animals out |
| Split rail | $7–$10 | 10–15 years | Minimal | Decorative boundaries, large lots |
For a vegetable garden specifically, I like welded wire (2×4 inch mesh) framed with wood posts better than pickets — it keeps rabbits out, doesn't shade the plants, and you can see the garden from the yard. My current garden fence is cedar posts with welded wire, and it's the most functional fence I've built.
Step-by-Step: Building It Right
Step 1: Check before you dig. Call 811 (the national "call before you dig" line) at least 2–3 business days before digging. It's free, it's the law in most states, and hitting a gas line turns a $1,000 fence into a five-figure disaster. Also check your local fence codes — many towns cap front-yard fences at 3–4 feet and require permits above a certain height. My town requires a permit for any fence over 4 feet; my garden fence is exactly 4 feet, which was a deliberate choice.
Step 2: Lay out the line. Run a mason's string between batter boards (or stakes) marking your fence line. Mark post locations every 8 feet with spray paint or flags. Walk the line and adjust for obstacles — it's much easier to shift a paint mark than a set post.
Step 3: Dig the holes. Post holes should be 3x the width of the post (about 12 inches diameter for a 4×4) and deep enough to bury one-third of the post — 2 feet deep for a 4-foot fence. In cold climates, go below the frost line or frost heave will push your posts up over winter; my area's frost line is 30 inches, so I dig 32 inches for any fence I want to last. A manual post-hole digger works fine for 14 holes; for more than 20, rent a power auger ($75–$100 for half a day). I dug 14 holes by hand on my first fence and couldn't lift my arms the next day. Rent the auger.
Step 4: Set the posts. This is where my first fence failed, so here's the method that works:
- Pour 4–6 inches of gravel in the bottom of each hole for drainage. This is the single most important rot-prevention step — posts rot where water sits against them, and gravel lets water drain away from the buried wood.
- Set the post, check it's plumb with a level on two adjacent faces, and brace it with 2x4s staked into the ground.
- Pour one 50-lb bag of dry concrete mix around the post (the dry-set method — no mixing, no water added by you). Then pour about a gallon of water over it. The moisture in the ground plus the water you add cures it. I was skeptical of dry-setting until a contractor friend showed me; my 2023 fence was dry-set and every post is still rock solid.
- Slope the top of the concrete slightly away from the post so water runs off instead of pooling against the wood.
- Let posts cure 24–48 hours before attaching rails.
Set your corner and gate posts first, run a string between them at rail height, and set the line posts to the string. This keeps the whole fence straight even if your holes wandered a bit.
Step 5: Attach the rails. Two rails per section for a 4-foot fence — one about 8 inches from the top, one about 8 inches from the bottom. Attach with 3-inch exterior screws, two per rail end, pre-drilling to prevent splitting. Keep rails level; the pickets will follow the rails, so crooked rails mean a crooked fence.
Step 6: Hang the pickets. Start at one end. Use a spacer block (a scrap of wood cut to your gap width — I use 1/2 inch for a garden fence, enough for airflow) between pickets to keep spacing consistent. Two screws per picket per rail. Check every 4–5 pickets with a level that they're vertical — it's easy to drift, and a fence that's visibly leaning pickets looks amateurish from across the yard.
Step 7: Build the gate last. Gates are the fussiest part. Build the frame slightly smaller than the opening (leave 1 inch total clearance), add a diagonal brace running from the bottom hinge side to the top latch side (this prevents sagging — the #1 gate failure), and use real gate hinges, not the flimsy decorative ones. My first gate sagged within a year because I skipped the diagonal brace. The rebuilt one with a proper brace hasn't moved in three years.
Mini Case Study: My 2023 Cedar Garden Fence
Real numbers from my actual build, because estimates are nice but receipts are better:
- Size: 96 linear feet (12 sections at 8 ft), 4 feet tall, one 3-foot walk gate
- Materials: 14 PT 4x4x6 posts, 26 PT 2x4x8 rails, 210 cedar pickets, 14 bags concrete, 5 lbs deck screws, gate hardware kit
- Material total: $1,042 (lumber yard, not big-box — about 12% cheaper)
- Tool rentals: $85 (power auger, half day)
- Time: Two weekends — one Saturday for holes and posts, the following Saturday for rails, pickets, and gate. About 22 hours total working solo, and I'd budget 30% more time if it's your first fence.
- Cost per linear foot: $11.74 all-in
- Status after 3 years: Still straight, no rot, no sagging gate. The cedar has weathered to a silver-gray that I actually prefer over the original reddish tone.
The biggest surprise was how much the lumber yard beat the big-box store — same cedar pickets, $3.60 each versus $4.25. On 210 pickets that's $136 saved for one phone call.
Common Mistakes
1. Spacing posts too far apart. My 10-foot spacing "to save money" caused visible sag in the rails within two years. Stick to 8 feet max for garden fences, 6 feet for anything taller or in high-wind areas. The 3–4 extra posts cost maybe $60 and save the whole fence.
2. Burying posts without gravel or concrete. Dirt holds moisture against wood. My first fence had two posts rot at grade by year four. Gravel base + concrete collar is non-negotiable.
3. Using interior or non-coated fasteners outdoors. They'll rust, bleed, and fail. Exterior-rated deck screws or hot-dipped galvanized nails only. And with cedar, make sure they're coated or stainless to avoid the tannin reaction.
4. Not calling 811. I got lucky on my first fence. A neighbor two streets over hit a buried electric line building a fence and got a $4,000 repair bill plus a very angry utility company. The call is free. Make it.
5. Building the gate without a diagonal brace. Gates sag. It's physics — a rectangle with hinges on one side wants to become a parallelogram. The diagonal brace from bottom-hinge to top-latch turns it into two triangles, which don't deform. Every gate, every time.
FAQ
1. How deep should garden fence posts be? Bury one-third of the post's above-ground height as a minimum — 2 feet for a 4-foot fence. In freeze zones, go below the local frost line regardless (mine is 30 inches). Shallow posts heave in winter and lean within a couple of seasons.
2. How much does a 100-foot garden fence cost in 2026? DIY: $450–$650 for pressure-treated pine, $800–$1,100 for cedar, $1,500–$2,200 for vinyl. Professionally installed, add $15–$35 per linear foot. My 96-foot cedar fence cost $1,127 all-in including tool rental, working out to $11.74 per foot.
3. Do I need a permit for a garden fence? Depends on your town. Many municipalities require permits for fences over 4 feet tall, and some regulate front-yard fences down to 3 feet or require specific materials. Call your building department before buying materials — a $50 permit is cheaper than tearing down a non-compliant fence.
4. Cedar vs. pressure-treated pine for a garden fence — which is better? Cedar, if the budget allows. It costs 40–60% more but lasts roughly twice as long (15–20 years vs. 10–15), looks better unstained, and doesn't need chemical treatment. For a vegetable garden specifically, cedar also avoids the (mostly outdated but still common) worry about treated lumber chemicals near food plants.
5. How long does it take to build a 100-foot fence DIY? A solo beginner should budget two full weekends: one for layout, holes, and setting posts (including concrete cure time), one for rails, pickets, and the gate. About 20–30 hours of actual work. A helper cuts that significantly — the picket-hanging goes twice as fast with one person holding and one screwing.
About the Author
Dave Collins is a hands-on DIY enthusiast who has spent the past 15 years renovating three of his own homes. He learned most of what he knows by making mistakes first, then asking pros what he did wrong. On this site he writes practical, numbers-first guides so you can skip the mistakes and get it right the first time.