
# Beginner's Guide to Laying Floor Tiles
My first tile job was a 5×8 bathroom floor, and it took me three weekends. Crooked tiles, a lip you could trip on, thinset hardening in the bucket because I mixed too much at once. It beat the vinyl it replaced — but barely.
Six rooms later, I tiled a 200-square-foot kitchen in a single weekend and the layout is dead square. Tiling is a sequence: plan the layout first, mix small batches of mortar, check with a level every few tiles. This guide is the sequence I wish I'd had for that bathroom.
What You'll Need
| Tool | What to Buy | Typical Cost | Notes |
|---|---|---|---|
| Wet tile saw | 7-inch, rentable | $50–$65/day rental | Buy ($90–$150) only if tiling 2+ rooms |
| Tile snap cutter | Manual score-and-snap | $30–$50 | Faster than the wet saw for straight cuts |
| Notched trowel | 1/4" × 3/8" for 12" tiles | $10–$15 | Match notch size to tile size |
| Tile spacers | 1/8" or 3/16", bag of 500 | $6–$8 | Buy more than you think |
| Level | 4-foot level | $25–$40 | Check every few tiles |
| Rubber grout float | Standard float | $10–$12 | Presses grout into joints |
| Grout sponge + buckets | Large sponge, 2 buckets | $10 | One for mixing, one for wash water |
| Knee pads | Gel or foam | $20–$30 | You'll live on your knees |
| Chalk line, tape measure, square | Layout basics | $20 total | Layout is everything |
Materials: tiles, thinset mortar ($15–$20 per 50-lb bag, covers ~90–100 sq ft), grout ($15–$25 per bag), and backer board if you're tiling over a wood subfloor ($12–$15 per 3×5 sheet).
Step 1: Prep the Subfloor
Tile is only as good as what's under it. Tile and thinset are rigid — if the floor flexes, the tile cracks. Two tiles in my first bathroom cracked within six months because I tiled over a bouncy plywood subfloor.
The deflection rule: the floor must be stiff enough not to bounce. The practical minimum is 3/4-inch plywood subfloor over joists 16 inches apart. If yours is 1/2-inch plywood or OSB, add a second layer or an uncoupling membrane.
Over wood subfloor: install 1/4-inch cement backer board. Screw it down every 8 inches, tape seams with alkali-resistant mesh tape, and skim thinset over the seams.
Over concrete: clean thoroughly, fill cracks wider than 1/8 inch, and check for moisture — tape a 2×2 ft square of plastic down for 24 hours; moisture underneath means you need a barrier first.
Remove everything: toilet, vanity, baseboards, old flooring. Tiling around a toilet instead of under it looks terrible and leaks eventually. Pull the toilet — it takes 20 minutes and a $5 wax ring to reset it.
Step 2: Plan Your Layout (The Most Important Step)
This is the step beginners skip and pros never do. A bad layout means sliver cuts along the walls and a floor that looks drunk.
Find the center. Snap chalk lines from the midpoints of opposite walls, crossing at the room's center. Start here — not the corner, not the doorway. Corner starts guarantee a 1-inch sliver on the far wall.
Do a dry layout. Lay tiles along both chalk lines with spacers, from center to walls, without mortar. This shows exactly what size the wall cuts will be.
The rule: no cut smaller than half a tile at any wall. If the dry layout leaves a 2-inch sliver at the wall, shift the whole layout half a tile for equal, larger cuts on both sides. On my kitchen, shifting the center line 6 inches turned two ugly slivers into two clean 8-inch cuts.
My 5×8 bathroom used 12×12 tiles. Room width 60 inches ÷ 12.5 (tile + grout line) = 4.8 tiles — a 10-inch cut at one wall. Shifting the center 6 inches gave me two equal 11-inch cuts on both sides instead. Balanced looks intentional; unbalanced looks like a mistake.
Step 3: Mix the Thinset
Thinset mortar is the glue, and mixing it right matters more than most beginners think.
- Pour cool water into the bucket first (check the bag ratio — usually 5–6 quarts per 50-lb bag), then add powder gradually while mixing with a paddle mixer.
- Mix to creamy-peanut-butter consistency — holds its shape on the trowel but stays workable.
- Let it slake (rest) 10 minutes, then remix briefly. This step is on every bag and skipped by every beginner. Don't skip it.
Mix small batches. A full 50-lb bag is too much for a beginner — thinset starts setting in 30–45 minutes. I mix a quarter bag at a time now. On my first bathroom I mixed a full bag and the last third hardened in the bucket: $7 in the trash and a panicked remix mid-floor.
Step 4: Set the Tiles
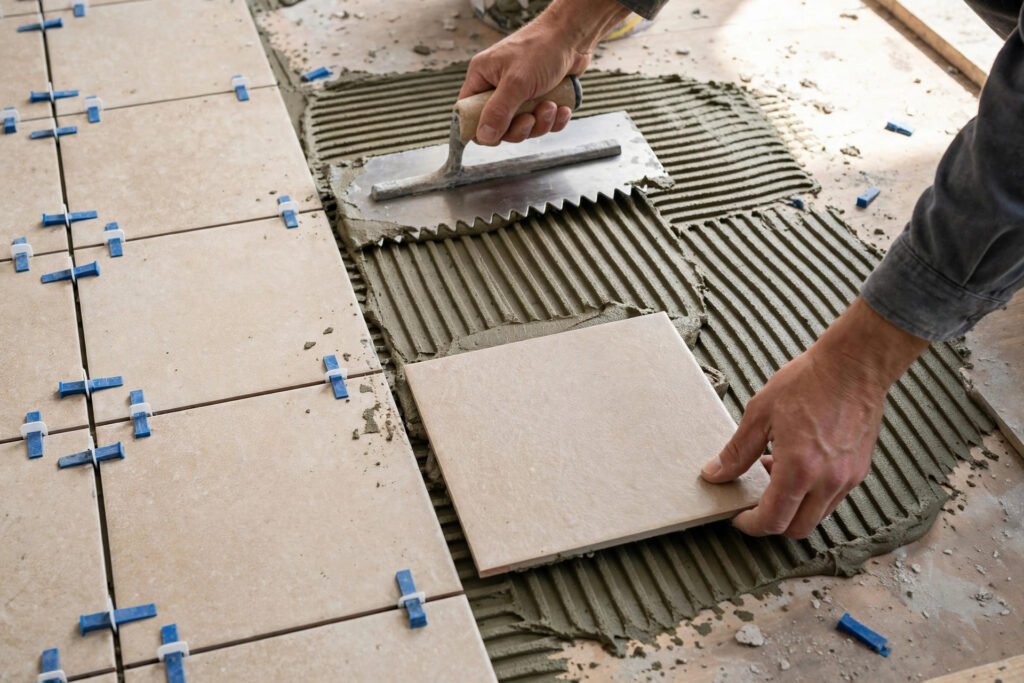
Work in small sections — about 3×3 feet at a time. Spread thinset with the flat side of the trowel, then comb it with the notched side, holding the trowel at 45 degrees. You want even ridges across the whole section.
- Press the first tile into the thinset at your center cross with a slight twist — the twist collapses the ridges and kills air pockets.
- Place spacers at the corners, then set the next tile tight against them.
- Level-check every 3–4 tiles. Fix height differences now: press down high tiles, or lift and add mortar under low ones.
- Back-butter large tiles. For any tile 12 inches or bigger, skim-coat thinset on the back too. This prevents hollow spots and cracked tiles. I skipped this on my first job, and the hollow-sounding tiles are all ones I didn't back-butter.
Keep the grout lines clean. Wipe excess thinset out of the joints as you go. Thinset squeezed into the joints blocks the grout later, and digging it out after it hardens is miserable.
Work from the center outward, leaving cut tiles for last. Plan your exit path before starting each section — don't tile yourself into a corner.
Step 5: Make the Cuts
Measure each cut individually — walls are never square, and assuming they are is how you get gaps.
- Straight cuts: use the snap cutter. Score once, firmly, then snap. Faster and cleaner than the wet saw for straight lines.
- Notches and curves (door frames, pipes): use the wet saw. Mark the cut with a wax pencil, cut slowly, and let the blade do the work — forcing it chips the tile.
- Small holes (toilet flange, pipes): mark the circle and make a series of straight cuts with the wet saw to nibble away the waste, or use a diamond hole saw ($15) in a drill.
Safety: wear safety glasses and ear protection with the wet saw. Push the tile through with steady pressure — never force it, or the tile chips. Keep a push stick nearby for small pieces.
Step 6: Let It Cure, Then Grout
Wait at least 24 hours before walking on the tile or grouting — grouting over uncured thinset shifts tiles.
- Remove all spacers — use the kind that sit on top, not the kind that get buried.
- Mix grout stiffer than thinset: thick peanut butter.
- Spread diagonally across the joints with the rubber float, pressing firmly to pack them full. Diagonal strokes push grout in; straight strokes pull it out.
- After 15–20 minutes, wipe with a damp (not wet) sponge in diagonal strokes, rinsing constantly.
- Buff the haze off with a dry cloth after a couple of hours.
Grout choice: sanded grout for joints 1/8 inch and wider (standard for floors — stronger under foot traffic); unsanded for narrower joints. Pick a grout color close to the tile color — contrasting grout shows every imperfection in your lines.
Step 7: Seal and Finish
Wait 48–72 hours after grouting, then apply grout sealer. Sealer doesn't make grout waterproof — it makes it stain-resistant. In a bathroom or kitchen, don't skip it: I skipped sealer in a kitchen once and the grout near the stove was permanently discolored within a year.
Reinstall the baseboards, reset the toilet with a new wax ring, and caulk where tile meets tub, walls, and fixtures. Use caulk, not grout, at every change of plane — grout cracks at corners because the surfaces move independently; caulk flexes.
Tile Size Comparison: What Should a Beginner Choose?
Bigger isn't harder — it's actually easier in some ways. Here's how common sizes compare for a first-timer:
| Tile Size | Difficulty for Beginners | Cuts Needed | Grout Lines | My Take |
|---|---|---|---|---|
| 6×6 inch | Easy to handle, fussy layout | Many | Many | Fine for small bathrooms |
| 12×12 inch | The sweet spot | Moderate | Moderate | Best first-timer choice |
| 12×24 inch | Heavier, needs back-buttering | Fewer | Fewer | Great look, harder to level |
| 24×24 inch | Hard to handle solo | Fewest | Fewest | Skip until you've tiled before |
I recommend 12×12 for a first project: light enough to handle, simple layout math, and grout lines forgiving of small errors. My kitchen's 12×24 tiles look fantastic but took noticeably more leveling effort per tile.
Common Mistakes
Starting in the corner. Start from the center lines. Corner starts produce sliver cuts and crooked-looking floors.
Mixing too much thinset. It sets in 30–45 minutes. Mix a quarter bag at a time until you know your pace.
Skipping the dry layout. Thirty minutes of dry-fitting saves you from the 2-inch sliver that ruins the look.
Not back-buttering large tiles. Hollow spots become cracked tiles. Skim-coat the back of every tile 12 inches or larger.
Grouting over dirty joints. Thinset in the joints has to come out before grout goes in. Clean joints as you set tiles.
Using grout instead of caulk at corners. Where tile meets tub or wall — caulk. Grout there cracks within a year.
FAQ
How long does it take to tile a bathroom floor? A 5×8 bathroom (40 sq ft) took me three weekends as a beginner; it'd take me one full day now. Realistic beginner plan: one day for prep and layout, one day to set tile, a half day to grout and seal — plus 24-hour cure times, so 4–5 days elapsed.
Can I tile over existing tile? Sometimes — if the old tile is solidly bonded and level. But you lose 3/4 inch of height, which causes problems at doorways and toilet flanges. I always remove old tile in bathrooms; the height headaches aren't worth the saved demo time.
Do I need a wet saw, or can I rent one? Rent one — $50–$65 a day, one day for a bathroom, maybe two for a kitchen. A manual snap cutter ($30–$50 to buy) handles straight cuts faster; rent the saw for notches and curves.
What size trowel do I need for 12×12 floor tile? A 1/4" x 3/8" square-notch trowel. The notches meter the thinset — too little and the tile doesn't bond, too much and it squeezes into every grout line. Match the trowel to the tile size per the thinset bag's chart.
Why are my tiles not level with each other (lippage)? Usually uneven thinset, inconsistent pressing, or skipped back-buttering on large tiles. Check with a 4-foot level every few tiles while the thinset is wet — that's when it's fixable. A tile leveling system (~$25 for 100 spin caps) is cheap insurance for 12×24 and larger.
About the Author
Dave Collins is a hands-on DIY enthusiast who has spent the past 15 years renovating three of his own homes. He learned most of what he knows by making mistakes first, then asking pros what he did wrong. On this site he writes practical, numbers-first guides so you can skip the mistakes and get it right the first time.