
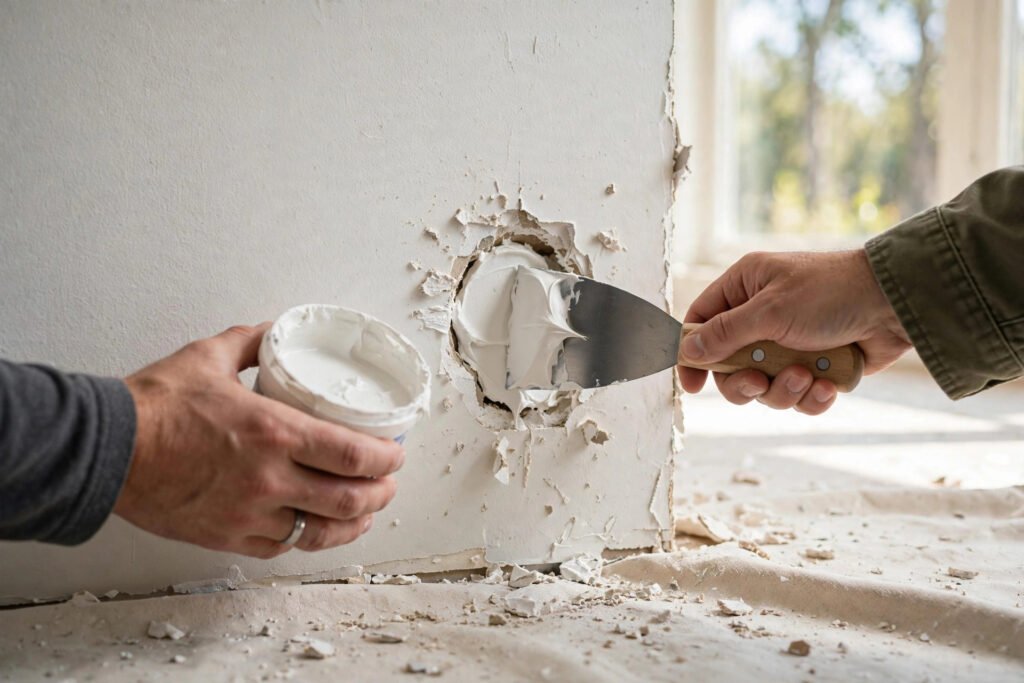
The first hole I ever patched was a doorknob punched straight through the wall behind my son's bedroom door. I filled it with joint compound, slapped on some paint, and stood back to admire my work — which looked like a small gray moon crater glowing in the middle of the wall. It took me two more attempts to figure out what I'd done wrong. This guide is everything I learned from those mistakes, so you can get it right the first time.
What Kind of Hole Are You Dealing With?
Before you buy anything, figure out what size repair you're facing, because small nail holes and big holes are entirely different jobs.
Small holes (nail holes, screws, dents)
Anything under 1/2 inch across. This is the easy stuff — a dab of spackle, a light sand, and paint. Total time: about 20 minutes including drying.
Medium holes (1–4 inches)
Doorknob holes, accidental dents from moving furniture, a wall anchor pulled out. These need a self-adhesive mesh patch or a small repair kit.
Large holes (4–12 inches)
These need a real patch: a cut piece of drywall screwed into backing strips or a California/hot patch. Anything bigger than about 12 inches and you're better off cutting back to the studs and replacing the section.
Tools and Materials
Here's what I keep in my drywall repair kit. For a single small repair you won't need all of this, but having it on hand saves a trip to the hardware store mid-job.
| Item | Cost (approx.) | What it's for |
|---|---|---|
| Lightweight spackle (8 oz tub) | $5–7 | Nail holes, dents |
| Self-adhesive mesh patches | $6 for a pack of 4 | Medium holes 1–4" |
| Pre-mixed joint compound (1 qt) | $8–10 | Medium and large patches |
| Setting-type compound (5 lb bag, "20-minute") | $12 | Faster builds, less shrinking |
| Drywall screws (1-1/4") | $8 for a box | Securing patches/backing |
| Fiberglass mesh tape | $7 per roll | Large patch seams |
| 6" taping knife | $10 | Spreading compound |
| 12" taping knife or drywall trowel | $16 | Feathering wide patches |
| Fine sanding sponge (120 grit) | $4 | Smoothing dried compound |
| Scrap piece of 1/2" drywall | $3–5 | Backing large holes |
One note: most interior walls are 1/2-inch drywall. Older homes or ceilings may be 5/8-inch. Match your patch to the wall thickness or the patch will sit proud of the surface and you'll sand forever trying to blend it.
How to Patch Small Holes (Under 1/2 Inch)
- Clean out the hole. Run a utility knife around the rim to knock off any loose paper or drywall crumbs. If the hole has loose fibers poking out, the spackle won't grip them.
- Push in a little spackle. Use a putty knife and press spackle firmly into the hole. Don't glob it — overfilling is the number one beginner mistake here.
- Scrape flush. Drag the putty knife flat across the wall to scrape off the excess. You want the spackle sitting just barely proud of the surface, maybe 1/64 of an inch.
- Let it dry completely. Spackle changes color when it dries (usually from pink or gray to white). Give it the full time on the label — usually 1–2 hours.
- Sand lightly. One pass with a 120-grit sanding sponge is usually enough. Use a light touch; you're blending, not excavating.
- Wipe and paint. Wipe the dust off with a damp cloth, then spot-prime before painting. Skipping the primer is why patches "flash" — the compound drinks paint differently than the wall and shows through.
How to Patch Medium Holes (1–4 Inches): The Mesh Patch Method
This is the method I use for doorknob holes, and it's the repair that separates convincing work from visible work.
- Trim the damaged area. Cut away any torn paper around the hole with a utility knife so you have clean edges. Peel off loose chunks of drywall.
- Apply the self-adhesive mesh patch. Center the patch over the hole, pressing the adhesive edges firmly onto the wall. This is why it works so well — the mesh gives the compound something to grab and prevents the cracking you'd get with compound alone.
- First coat of joint compound. Using a 6-inch knife, spread a thin layer of compound over the entire patch, working from the center outward. Press hard enough to force compound through the mesh. Keep this coat thin — maybe 1/16 inch.
- Let it dry. Pre-mixed compound needs a full 24 hours between coats in normal conditions. If you rush it, the center stays soft while the surface skins over, and you'll get bubbles when you sand.
- Second coat, feathered wider. Extend the compound 2–3 inches past the first coat on every side. This feathering is what makes the patch disappear — you're building a gradual ramp, not a mesa.
- Third coat if needed. Hold a work light at a low angle across the wall. If you can see the edges of the patch or the mesh texture showing through, apply a thin third coat feathered even wider.
- Sand smooth. Use a sanding sponge and light pressure, feathering the edges into the surrounding wall. Wipe down with a damp cloth.
- Prime and paint. Use a drywall primer on the repaired area, then paint to match. For small areas you can feather the paint edges with a mini roller to blend.
How to Patch Large Holes (4–12 Inches)
For big holes, a mesh patch isn't strong enough. You need an actual piece of drywall. The California patch (also called a hot patch) is my favorite method because it doesn't require finding a stud.
- Square up the hole. Use a drywall saw to cut the ragged hole into a clean rectangle. Measure the rectangle.
- Cut your patch. Cut a piece of drywall about 2 inches larger than the hole in both dimensions.
- Trim the back paper. On the back of the patch, score the paper 2 inches from each edge and peel away the gypsum core, leaving a border of paper flaps on all four sides. The gypsum plug in the center should fit the hole exactly.
- Apply compound to the hole edges. Spread a layer of joint compound around the inside edges of the hole.
- Press the patch in. Push the gypsum plug into the hole so the paper flaps lie flat against the wall around it. The flaps act as built-in tape.
- Skim compound over the flaps. Using a 6-inch knife, spread compound over the paper flaps, feathering the edges 6–8 inches out.
- Second and third coats. Let dry 24 hours between coats. Each coat should go wider than the last. For a 10-inch patch, your final feathered area might be 20 inches across.
- Sand, prime, and paint. Same finish process as a medium patch.
Mesh Patch vs. Patch Kit vs. California Patch
| Method | Hole size | Skill level | Drying time | Strength | Best for |
|---|---|---|---|---|---|
| Spackle fill | Under 1/2" | Beginner | 1–2 hours | Cosmetic only | Nail holes, dents |
| Self-adhesive mesh patch | 1–4" | Beginner | 24 hours/coat | Moderate | Doorknob holes, anchor pullouts |
| California (hot) patch | 4–12" | Intermediate | 24 hours/coat | High | Large holes with no stud access |
| Stud-to-stud replacement | 12"+ | Advanced | 24 hours/coat | Full wall strength | Very large damage |
My Three Biggest Drywall Mistakes
Mistake 1: Too much compound on coat one. My first doorknob repair had a mound of compound a quarter inch thick. It took two days to dry through, cracked as it shrank, and I had to scrape it all off and start over. Two thin coats always beat one thick one. Compound shrinks as it dries — thick coats crack and take forever.
Mistake 2: Skipping the primer. On that same repair, I painted directly over the sanded compound. The spot sucked up the paint and dried flat while the surrounding wall had a slight sheen. It was visible from across the room. Drywall primer is $15 a gallon and it solves this completely.
Mistake 3: Sanding before it was dry. The surface feels dry hours before the middle is dry, especially with pre-mixed compound. Sanding too early gums up your sanding sponge and tears the surface. When in doubt, give it another 12 hours. Or switch to 20-minute setting compound for small jobs — it hardens chemically instead of by evaporation, so it's genuinely done when it says it's done.
The Worked Example: A Doorknob Hole, Start to Finish
Last spring I patched a 2-inch doorknob hole in a rental I was freshening up before new tenants. Here's the real timeline:
- Day 1, 7:00 PM: Trimmed the ragged edges, stuck on a mesh patch, applied first thin coat of compound. 15 minutes of work.
- Day 2, 7:00 PM: Checked that the coat was fully dry (it was). Applied second coat, feathered 3 inches wider. 10 minutes.
- Day 3, 7:00 PM: Inspected with a work light at a low angle. Could barely see the patch edges, but one corner needed a thin third coat. 8 minutes.
- Day 4: Sanded smooth with a 120-grit sponge, wiped with a damp cloth, applied primer, let it dry 1 hour, then rolled on two coats of matching paint. 45 minutes total.
Four days sounds like a lot, but actual hands-on time was under 90 minutes. The rest was drying time. You could do the same repair over a long weekend, or compress it to one day with 20-minute setting compound — just know that setting compound is harder to sand, so keep your coats thin.
Common Mistakes
- Overfilling small holes with spackle. Spackle shrinks as it dries. A big glob shrinks into a divot, and now you need a second application. Press it in firmly and scrape flush.
- Not cleaning the dust before priming. Sanding dust sits on the wall and the primer bonds to the dust instead of the wall. Always wipe with a damp cloth first.
- Painting without primer. Compound absorbs paint at a different rate than painted drywall. Without primer, the repair flashes — it shows as a dull or shiny spot depending on the light.
- Using the wrong drywall thickness for patches. A 3/8-inch patch in a 1/2-inch wall leaves a recess you can never quite fill convincingly. Measure your wall thickness first.
- Sanding with too much pressure. Heavy sanding creates low spots around the patch that telegraph through the paint. Let the abrasive do the work with light, even pressure.
- Skipping the work-light check. Normal ceiling light hides imperfections. A lamp held at a shallow angle against the wall reveals every ridge and bump before you paint.
FAQ
How long does it take to patch a drywall hole? Hands-on time is usually 20–90 minutes depending on size. But pre-mixed joint compound needs about 24 hours of drying time between coats, so a medium or large patch takes 2–4 calendar days from start to paint.
Can I patch drywall without sanding? You can minimize sanding by keeping your coats thin and smoothing each coat with a damp knife before it dries, but some sanding is always needed for an invisible repair. A sanding sponge makes it quick.
Spackle vs. joint compound — which should I use? Use spackle for nail holes and small dents only. Use joint compound for any patch bigger than 1/2 inch — spackle shrinks too much and cracks on larger repairs.
How do I match the wall texture? Orange-peel texture is the most common in US homes. After your final sand but before priming, spray a can of orange-peel texture ($12 at any hardware store) over the repair, let it dry, then prime and paint. Match the existing texture's heaviness by testing on cardboard first.
Why does my patch keep cracking? Usually one of three things: the compound coat was too thick, you sanded and recoated before it was fully dry, or there's movement in the wall (a door slamming against it, for example). For holes in high-impact spots, use setting-type compound — it's significantly harder and crack-resistant once cured.
About the Author
Dave Collins is a hands-on DIY enthusiast who has spent the past 15 years renovating three of his own homes. He learned most of what he knows by making mistakes first, then asking pros what he did wrong. On this site he writes practical, numbers-first guides so you can skip the mistakes and get it right the first time.