
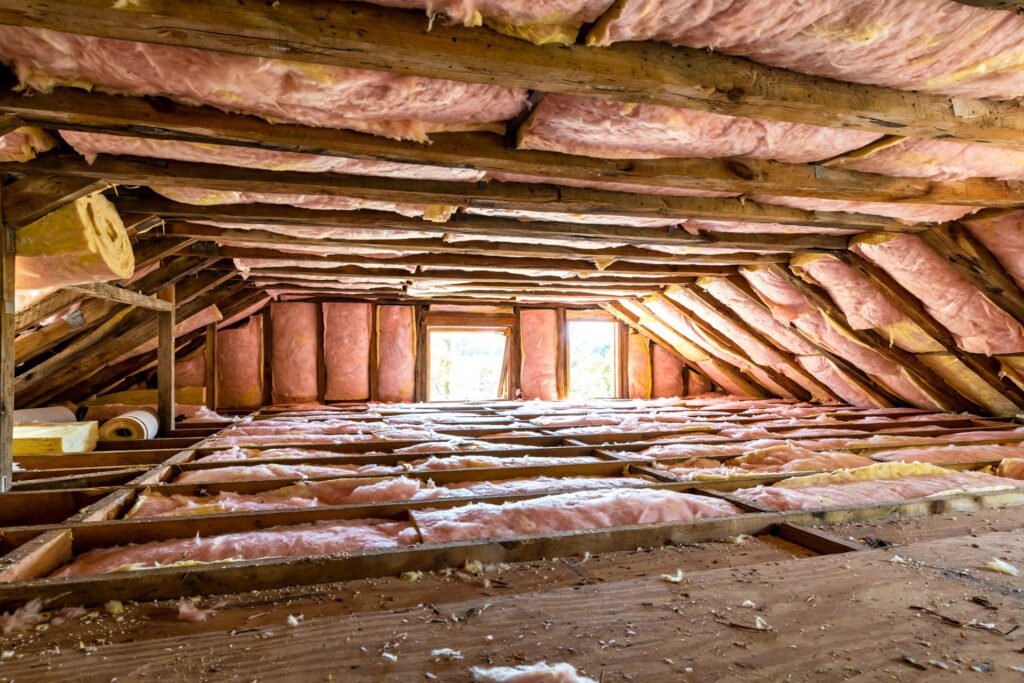
The first winter in our 1960s ranch, our heating bill hit $340 a month and the upstairs bedrooms still felt like a walk-in cooler. An energy auditor came out, stuck his head in the attic, and told me we had about 4 inches of compressed, decades-old insulation up there — roughly R-11 where we needed R-49. That one conversation started a project that cut our winter heating bill nearly in half. Here's everything I learned about insulation, minus the jargon.
What Is R-Value, and Why Does It Matter?
R-value measures how well insulation resists heat flow. Higher is better. R-30 resists twice as much heat flow as R-15. Simple as that.
Three things to understand about R-values:
- They add up. Two layers of R-15 batts give you R-30 (roughly — compression reduces effectiveness).
- They're per-inch for most materials. Fiberglass batts give about R-3.2 per inch; spray foam gives R-6 to R-7 per inch. So you need less thickness of spray foam to hit the same R-value.
- More isn't always cost-effective. Going from R-11 to R-30 in an attic saves a lot of energy. Going from R-49 to R-60 saves very little. There's a point of diminishing returns, and the Department of Energy's recommendations are set near that sweet spot.
The Main Types of Home Insulation
Fiberglass batts and rolls
The pink stuff. Pre-cut to fit standard stud and joist cavities (15" wide for 16" on-center framing). R-3.2 per inch. Cheap — about $0.50 to $1.00 per square foot for R-30 — and DIY-friendly.
The catch: batts only perform at their rated R-value if they're installed perfectly — no gaps, no compression, no voids around wiring and pipes. In the real world, poorly installed batts can lose 25–50% of their effectiveness. I pulled out batts in my attic that had been stuffed around junction boxes with 3-inch gaps beside them. Those gaps were basically open holes in my insulation.
Blown-in fiberglass or cellulose
Loose insulation blown into attics with a machine. R-2.2 to R-3.8 per inch depending on material. About $1.00–$1.50 per square foot installed for R-38.
This is my top recommendation for most attics. It fills every nook, flows around obstructions, and goes in fast — a crew can do a whole attic in half a day. Many home improvement stores lend you the blower for free when you buy 10+ bags of insulation.
Rigid foam board (XPS, EPS, polyiso)
Stiff panels, R-4 to R-6.5 per inch. Used on exterior walls, basement walls, and under slabs. Polyiso has the highest R-value per inch but loses some performance in very cold weather. XPS is the blue or pink board you see at every job site.
Foam board is the right choice wherever insulation might get wet or needs to be thin — basement walls, rim joists, exterior sheathing. It doesn't absorb water the way fiberglass does.
Spray foam (open-cell and closed-cell)
Sprayed as a liquid that expands and hardens. Open-cell: R-3.5 per inch, cheaper, allows some moisture movement. Closed-cell: R-6 to R-7 per inch, acts as a vapor barrier, much more expensive ($1.50–$3.00+ per square foot per inch of thickness).
Spray foam is the best-performing option and the most expensive. It's also the only insulation that's realistically a pro-only job — the chemicals require proper protective equipment and the application technique matters enormously. I hired out the rim joists in my basement and did the attic myself with blown cellulose. Best of both worlds.
Mineral wool (rockwool)
Made from spun rock or slag. R-3 to R-3.3 per inch, denser than fiberglass, naturally fire-resistant, and excellent for soundproofing. About $1.00–$1.50 per square foot. It's my pick for interior walls where sound matters (bedrooms, home offices) and around fireplaces or furnaces.
Insulation Types Compared
| Type | R-value per inch | Cost per sq ft | DIY-friendly? | Best used for |
|---|---|---|---|---|
| Fiberglass batts | ~3.2 | $0.50–$1.00 | Yes | Walls, attics (if installed carefully) |
| Blown cellulose | ~3.5 | $1.00–$1.50 | Yes (with rented blower) | Attics, wall cavities |
| Blown fiberglass | ~2.5 | $1.00–$1.50 | Yes (with rented blower) | Attics |
| Rigid foam (XPS) | 5.0 | $1.00–$2.00 | Yes | Basements, rim joists, exterior |
| Rigid foam (polyiso) | 6.5 | $1.50–$2.50 | Yes | Exterior walls, roofs |
| Open-cell spray foam | 3.5 | $1.00–$2.00 | No (pro job) | Attics, walls |
| Closed-cell spray foam | 6.5 | $2.00–$3.50 | No (pro job) | Basements, rim joists, roofs |
| Mineral wool batts | 3.0–3.3 | $1.00–$1.50 | Yes | Soundproofing, fire-rated areas |
Recommended R-Values by Climate Zone
The US is divided into 8 climate zones. Zone 1 is south Florida and Hawaii; Zone 8 is northern Alaska. Here's what the Department of Energy recommends:
| Location | Attic | Walls | Floor/Crawlspace |
|---|---|---|---|
| Zone 1–2 (Miami, Houston, Phoenix) | R-30 to R-49 | R-13 to R-15 | R-13 |
| Zone 3–4 (Atlanta, Dallas, Portland) | R-38 to R-60 | R-13 to R-21 | R-19 to R-25 |
| Zone 5–7 (Chicago, Boston, Minneapolis) | R-49 to R-60 | R-13 to R-21+ | R-25 to R-30 |
| Zone 8 (Fairbanks) | R-49 to R-60 | R-21+ | R-25 to R-30 |
Not sure of your zone? The DOE has a zip-code lookup tool, or just ask at your local building department — they'll know, and your local code sets the legal minimum anyway.
Where Insulation Matters Most (In Order)
If your budget is limited, attack in this order — biggest bang for the buck first:
- Attic. Heat rises. An under-insulated attic is the single biggest energy loser in most homes. This was my problem, and fixing it made the biggest difference.
- Air sealing. Not insulation exactly, but caulk and foam around every penetration — plumbing stacks, electrical runs, recessed lights, the attic hatch — before you insulate. Insulation slows heat; air leaks bypass it entirely. A $15 can of spray foam around attic penetrations can save more than $200 of extra insulation.
- Basement rim joists. The band of wood sitting on top of your foundation walls. Often completely uninsulated. Closed-cell spray foam or cut-and-cobble foam board here pays back fast.
- Walls. Harder to retrofit (usually means blown-in through drilled holes or opening walls), so this comes later unless you're already renovating.
- Floors over unconditioned spaces. Crawlspaces and garages below bedrooms.
My Attic Project: Real Numbers
Here's exactly what I did in that 1960s ranch, a 1,400 sq ft single-story:
- Before: ~4 inches of old compressed fiberglass, roughly R-11. Heating bill: $340/month in winter.
- Air sealing: one Saturday, 6 cans of spray foam ($8 each = $48) sealing every plumbing, electrical, and duct penetration in the attic. Also weatherstripped the attic hatch ($12).
- Insulation: rented a blower free with purchase, blew in 30 bags of cellulose ($11/bag = $330) to reach R-49 (about 14 inches).
- Total cost: ~$390 and two weekends.
- After: winter heating bill dropped to $190–$210/month. That's $130–$150/month saved, roughly $600–$700 per heating season. Payback in under one year.
No contractor, no special skills — just a dust mask, a headlamp, and patience. If your attic is accessible and under-insulated, this is the highest-ROI DIY project I know of.
Safety Notes
- Wear protection. Fiberglass and cellulose dust irritate lungs and skin. Wear an N95 respirator, goggles, gloves, long sleeves, and a headlamp. Attics are hot — go early in the morning.
- Don't cover recessed lights unless they're rated IC (insulation contact). Non-IC lights need a 3-inch clearance — covering them is a fire hazard. When in doubt, build a simple box from rigid foam board around each fixture with the required clearance.
- Don't block soffit vents. Attics need airflow from the soffits to the ridge vent. Install baffles (rafter vents, $2 each) before blowing insulation so you don't choke off ventilation.
- Watch your step. Step only on joists or lay plywood planks across them. One foot through the ceiling below turns a $400 project into a $1,000 drywall repair.
Common Mistakes
- Insulating before air sealing. Insulation doesn't stop air movement. Seal the leaks first, then insulate over the top.
- Compressing batts to fit. Stuffing an R-30 batt into a 2×4 wall doesn't give you R-30 — compression destroys the air pockets that do the insulating. Use the right thickness for the cavity.
- Leaving gaps around obstructions. Cut batts to fit around wiring and pipes, or better yet, use blown-in insulation that flows around everything.
- Blocking attic ventilation. Piling insulation over soffit vents causes moisture problems and ice dams. Baffles first, insulation second.
- Ignoring the attic hatch. An uninsulated, unsealed hatch is a 2×3-foot hole in your insulation. Glue foam board to the back and add weatherstripping.
- Mixing faced and unfaced batts incorrectly. Kraft facing is a vapor retarder and goes toward the warm side (interior in cold climates). Double vapor barriers — faced batts plus poly sheeting — can trap moisture. When adding a second layer in an attic, use unfaced.
FAQ
How much does it cost to insulate an attic? DIY blown-in cellulose or fiberglass runs $0.75–$1.50 per square foot for R-38 to R-49. A 1,000 sq ft attic costs roughly $750–$1,500 in materials. Professional installation typically runs $1.50–$3.50 per square foot.
Can I add new insulation over old insulation? Yes, as long as the old insulation is dry and in reasonable condition. Lay new batts perpendicular to the old ones, or blow new insulation over the top. Remove old insulation only if it's wet, moldy, or contaminated.
Is spray foam worth the extra cost? For rim joists, hard-to-reach cavities, and anywhere you need maximum R-value in minimum thickness — yes. For a standard accessible attic, blown cellulose or fiberglass gives you far more R-value per dollar.
What's the best insulation for soundproofing? Mineral wool batts in interior walls, plus attention to air gaps (sound travels through gaps, not just through materials). For serious soundproofing, combine mineral wool with resilient channel and double drywall.
Does insulation go bad over time? Fiberglass and mineral wool last decades if kept dry. Cellulose can settle 10–20% over the first couple of years — installers compensate by blowing extra depth. Any insulation that's been wet should be removed and replaced.
About the Author
Dave Collins is a hands-on DIY enthusiast who has spent the past 15 years renovating three of his own homes. He learned most of what he knows by making mistakes first, then asking pros what he did wrong. On this site he writes practical, numbers-first guides so you can skip the mistakes and get it right the first time.