
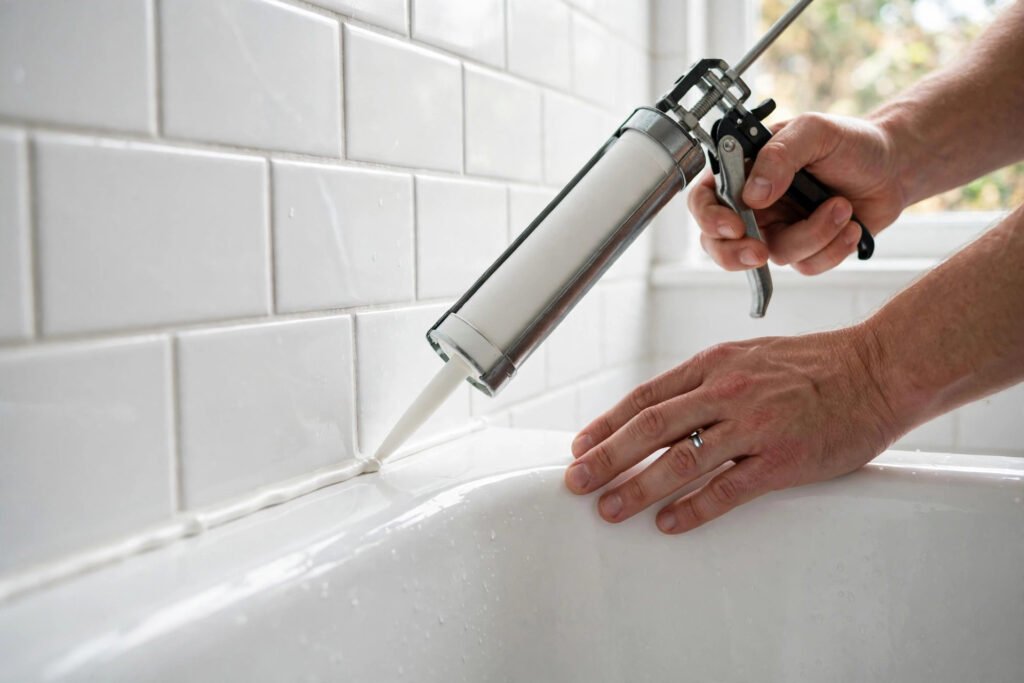
The caulk line around a bathtub is the thinnest, cheapest waterproofing in your whole house — and the one most likely to fail. When it fails, water sneaks behind the tub, into the wall, and under the floor, where it quietly rots wood and grows mold for months before you notice. I've ripped out two tub surrounds in my renovation years, and both times the root cause was the same: a $6 tube of the wrong caulk, applied badly, years ago.
The good news: caulking a tub is a one-hour job that costs under $20. Here's how to do it so it lasts a decade instead of a year.
What You Need
Gather everything before you start. Once silicone starts skinning over, you can't pause.
| Tool / material | What to get | Approx. cost |
|---|---|---|
| Caulk | 100% silicone, kitchen & bath formula | $8–12 |
| Caulk gun | Basic metal ratchet gun (skip the cheapest plastic ones) | $8–10 |
| Caulk remover tool | Plastic razor-style remover | $5 |
| Painter's tape | 1-inch blue tape | Already in your junk drawer |
| Rubbing alcohol or mineral spirits | For final surface prep | $4 |
| Paper towels and rags | Lots of them | — |
| Spray bottle with soapy water | Dish soap + water, for tooling | — |
| Nitrile gloves | Silicone sticks to skin and won't wash off | $3 |
The caulk choice matters more than anything else in this guide. Buy 100% silicone labeled for kitchen and bath. Not "siliconized latex." Not "paintable silicone blend." Pure silicone.
Here's why:
| 100% silicone | Latex / siliconized latex | |
|---|---|---|
| Waterproofing | Fully waterproof, stays flexible | Water-resistant at best, shrinks as it dries |
| Flexibility | Stays rubbery for 10+ years | Gets brittle, cracks with tub movement |
| Mold resistance | Kitchen/bath formulas include mildewcide | Poor — mold's favorite food |
| Lifespan around a tub | 7–15 years | 1–3 years |
| Paintable | No | Yes |
| Cleanup | Mineral spirits while wet | Water while wet |
Your tub flexes. Every time you fill it with 40+ gallons of water and climb in, the tub settles slightly against the wall. Latex caulk can't handle that movement — it cracks, water gets in, and you're recaulking in eighteen months. Silicone stretches and stays sealed. The only real downside is you can't paint over it, which doesn't matter on a tub joint.
Step 1: Remove Every Bit of Old Caulk
This is the step everyone rushes, and it's the step that determines whether the new caulk lasts. New caulk will not bond to old caulk. Period.
- Soften it. Score along both edges of the old caulk line with a utility knife or the caulk remover tool. For stubborn silicone, apply a silicone caulk remover gel and wait 2–3 hours (overnight for really old stuff).
- Pull it out. Use the remover tool or a plastic putty knife to pull the old bead out in strips. Work in 6-inch sections.
- Scrape the residue. Old silicone leaves an invisible oily film that new caulk won't stick to. Scrub the joint with mineral spirits on a rag, then wipe again with rubbing alcohol.
- Inspect. Run your finger along the joint. If you feel any rubbery residue, repeat. The surface should feel like clean tile and clean tub — nothing in between.
On my second tub, I got lazy here and left a thin skin of old caulk in the corner. Six months later the new bead peeled away from that exact spot in one clean strip. An hour of prep would have saved me doing the whole job twice.
Step 2: Deep-Clean and Dry the Joint
- Scrub the joint area with a bathroom cleaner to remove soap scum and body oils.
- Rinse and wipe dry.
- Let it air-dry for at least a few hours — overnight is better. Silicone will not bond to a damp surface. If you're in a hurry, hit it with a hair dryer on low for 10 minutes, then let it cool.
Kill any mold first. If there's black staining in the joint, that's mold living in or behind the old caulk. Scrub with a 1:3 bleach-water solution, rinse, and dry completely. Caulking over mold just seals it in.
Step 3: Tape Both Sides
Run painter's tape along both sides of the joint — one strip on the tub, one on the tile — leaving about a 1/4-inch gap where the caulk will go. This is the difference between a crisp professional line and a smeary mess.
Press the tape edges down firmly. Any gap under the tape edge becomes a caulk smear you'll be scraping off later.
Step 4: Cut the Tip and Load the Tube
Cut the caulk tube tip at a 45-degree angle, and cut it small — about a 1/8-inch opening. You can always cut more off; you can't cut less. A big opening lays down a fat bead that's hard to tool and looks amateur.
Poke the inner seal with a long nail or the poker built into most caulk guns. Load the tube, squeeze gently until caulk reaches the tip, then release the pressure (press the release tab) so it stops oozing.
Step 5: Apply the Bead
This is the part that looks intimidating and isn't.
- Hold the gun at roughly 45 degrees, tip pressed lightly into the joint.
- Squeeze with steady, even pressure and move along the joint at a constant speed — about 6 inches per few seconds. Don't stop mid-run if you can help it.
- Do one full side of the tub (or one wall section) in a single continuous bead.
- When you reach the end, release the trigger and pull the gun away quickly.
The bead should slightly overfill the joint — a small rounded ridge is fine. Too little caulk is worse than too much at this stage, because tooling (next step) thins it out.
Work in sections. Do the back wall, tool it, then the side wall, tool it. Silicone starts to skin over in 5–10 minutes depending on humidity. If you lay the whole tub's bead first and then start tooling, the first section will already be skinned and you'll tear it.
Step 6: Tool the Bead (The Most Important 60 Seconds)
"Tooling" means smoothing the bead into the joint with your finger. This is what makes it waterproof — it forces caulk into full contact with both surfaces.
- Put on a nitrile glove (or accept silicone under your fingernails for a week).
- Wet your finger in the soapy water spray, or spray the bead lightly.
- Draw your finger along the bead in one smooth, continuous motion with light, even pressure. Don't saw back and forth.
- Wipe the excess off your finger onto a paper towel. Re-wet. Continue.
One pass per section. If you keep fiddling with it, you'll make it worse — the silicone starts setting and reworking tears the surface.
Step 7: Pull the Tape Immediately
Pull the painter's tape right away, while the caulk is still wet — within a couple of minutes of tooling. Pull at a sharp angle away from the joint, slowly. This leaves a razor-sharp edge.
If you wait until the caulk skins, the tape will pull the bead edge up with it and ruin the line. Set a timer if you're the forgetful type. I am, and I ruined a perfect bead this way in 2019.
Step 8: Let It Cure — Don't Touch It
Silicone caulk needs 24 hours minimum before water exposure — 48 is safer in a humid bathroom. Tape a note to the shower handle if you share the bathroom. I once had a houseguest shower six hours after I recaulked. The bead survived, but I aged three years.
Full cure takes up to 7 days depending on the product, but 24–48 hours is enough for shower use.
Mini Case Study: The $6 Fix vs. the $2,400 Repair
In my second house, the hall bathroom tub had a caulk line that looked "a little rough" — small gaps at the corners, some discoloration. I ignored it for a year. When I finally pulled the tub surround during a remodel, the drywall behind the tub's back wall was black with mold and the subfloor edge was soft enough to push a screwdriver through. The repair — new drywall, subfloor patching, mold treatment — cost about $2,400 in materials and two weekends.
In my current house, I recaulk both tubs every 5–6 years as preventive maintenance. Total cost per tub: about $15 and 90 minutes. That ratio — $15 of prevention vs. $2,400 of cure — is why I'm so insistent about this unglamorous little job.
Common Mistakes
1. Using latex or "siliconized" caulk on a tub. It will crack within two years because the tub moves. 100% silicone only.
2. Caulking over old caulk. New caulk bonds to the tub and tile, not to old caulk. It'll peel off in sheets.
3. Skipping the mineral spirits wipe. Old silicone leaves an invisible film. If you don't dissolve it, the new bead has nothing to grip.
4. Cutting the tip too big. A fat bead is hard to tool, looks lumpy, and wastes caulk. Start small.
5. Caulking a wet joint. Silicone and moisture don't mix during application. Dry the joint completely.
6. Waiting too long to pull the tape. Pull it while the caulk is wet or don't bother taping at all.
7. Using the tub too soon. Give it 24 hours minimum. Water on uncured silicone ruins the seal.
8. Caulking the tub's weep holes. Some tubs and shower doors have small drainage gaps at the bottom track. Don't seal those — they're supposed to let water out.
FAQ
How long does bathtub caulk last? 100% silicone lasts 7–15 years around a tub. Latex caulk lasts 1–3 years. If your caulk is cracking, peeling, or growing mold that won't scrub off, it's done — replace it.
Can I caulk over old caulk? No. New caulk won't bond to old caulk, and it'll peel off within months. Remove every trace of the old bead, clean with mineral spirits, and start fresh.
Should I use silicone or latex caulk for a bathtub? 100% silicone, specifically a kitchen and bath formula with mildewcide. Latex shrinks, cracks with tub movement, and feeds mold. Silicone stays flexible and waterproof for a decade or more.
How long before I can shower after caulking a tub? Wait at least 24 hours; 48 hours is safer in humid bathrooms. The surface skins in under an hour, but the bead underneath needs a full day to cure enough to handle direct water.
Why does my tub caulk keep turning black? Black staining is mold growing in or behind the caulk. It's usually caused by using latex caulk (mold food), poor ventilation, or water getting behind a cracked bead. Kill it with bleach solution, remove the old caulk completely, and redo it with 100% silicone kitchen-and-bath caulk.
About the Author
Dave Collins is a hands-on DIY enthusiast who has spent the past 15 years renovating three of his own homes. He learned most of what he knows by making mistakes first, then asking pros what he did wrong. On this site he writes practical, numbers-first guides so you can skip the mistakes and get it right the first time.