
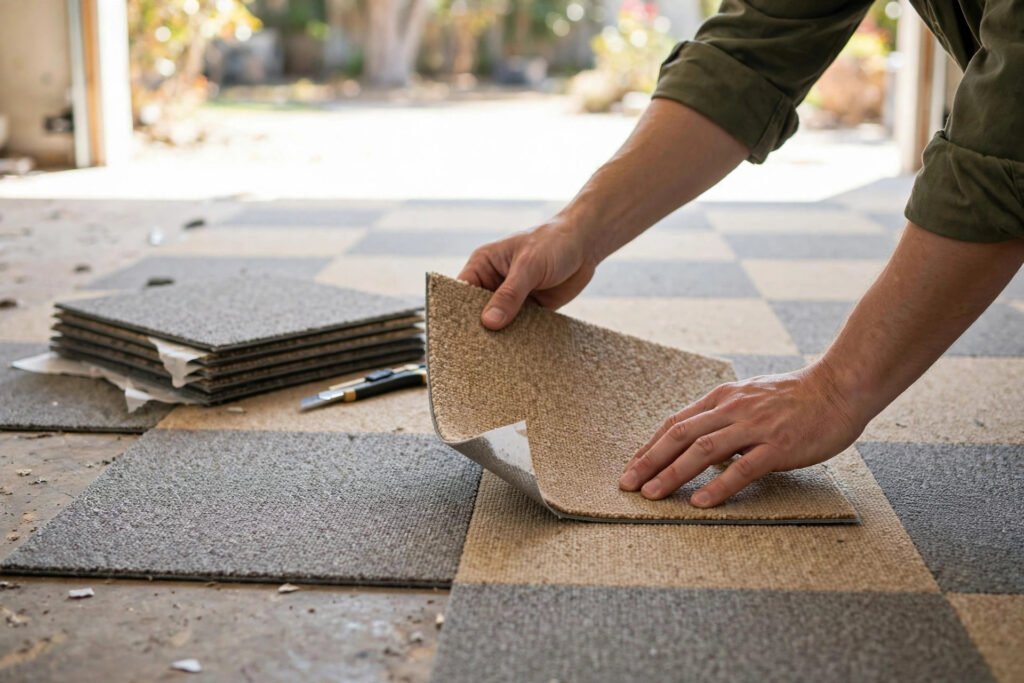
Peel-and-stick carpet tiles are the most beginner-friendly flooring I've ever installed — easier than laminate, easier than sheet vinyl, and far easier than wall-to-wall carpet. I did my home office (a 10×12 room) in a single Saturday afternoon, and the only tool I really needed was a utility knife.
But "easy" doesn't mean "foolproof." My first attempt had a crooked starting line that I didn't notice until the third row, and I wasted six tiles fixing it. This guide is the full process, in order, with the real numbers: how many tiles to buy, how to lay them out so the cuts land where you want them, and how to avoid the mistakes that cost me time and tiles.
What You'll Need
Here's my complete material and tool list for a typical 10×12 foot room (120 sq ft):
| Item | Quantity for 120 sq ft | Typical Cost |
|---|---|---|
| Peel-and-stick carpet tiles (24×24 in) | 32–34 tiles (buy 10% extra) | $1.50–$4.00 per tile |
| Utility knife + extra blades | 1 knife, 5–10 blades | $12–$18 |
| Straightedge or T-square | 1 (24 in or longer) | $10–$15 |
| Tape measure | 1 | Already owned, hopefully |
| Chalk line | 1 | $8–$12 |
| Knee pads | 1 pair | $15–$25 |
| Floor primer (for concrete or dusty subfloors) | 1 gallon | $20–$30 |
| Total | $110–$230 |
Carpet tiles are typically 24×24 inches, which means each tile covers exactly 4 square feet. A 120 sq ft room needs 30 tiles mathematically; buy 33–34 to cover cutting waste and future replacements. That 10% overage rule saved me on both my installs — keep 2–3 spare tiles in a closet afterward, because dye lots change and a future patch will never match perfectly if you buy later.
One thing about the adhesive: "peel-and-stick" carpet tiles use a pressure-sensitive adhesive that's strong but repositionable for the first few minutes. It's not the permanent glue-down of commercial carpet tile. That's good news — it means you can lift and re-stick a tile if you misplace it, at least on the first try.
Step 1: Prep the Subfloor (Don't Skip This)
I skipped proper prep on my first room and paid for it — two tiles along the exterior wall peeled up within a month because of dust on the concrete underneath. Here's the prep that actually works:
- Remove all furniture and the old flooring if it's carpet. Peel-and-stick tiles can go over existing vinyl or laminate if it's firmly adhered, flat, and clean — I installed over old sheet vinyl in a laundry room and it's held fine for three years. They cannot go over existing carpet.
- Sweep thoroughly, then vacuum. Then damp-mop and let the floor dry completely. The adhesive needs a clean, dry surface. Any dust is a future peeling tile.
- Check for flatness. Carpet tiles are more forgiving than laminate, but big dips or ridges will show as lumps or gaps. Walk the room and feel for high spots. A belt sander knocks down small ridges on wood subfloors; self-leveling compound fills dips on concrete.
- If the subfloor is bare concrete, dusty, or powdery, roll on one coat of floor primer and let it cure per the can's directions (usually 2–4 hours). This was the step I skipped the first time. Primer is $25 and takes an hour. Peeling tiles are a much bigger problem.
- Let the tiles acclimate. Bring the boxes into the room 24–48 hours before installing. I know it feels like overkill for carpet tiles, but temperature swings affect how the adhesive grabs. Room temperature (65–85°F) is the target.
Step 2: Find Your Starting Point
This is the most important layout decision in the whole project, and it's where I messed up my first install.
Don't start in a corner. Corners are never square — I measured one "square" corner in my office at 91.5 degrees, which doesn't sound like much until it's pushed a full row of tiles half an inch off by the far wall.
Instead:
- Find the center of the room. Measure the midpoint of two opposite walls and snap a chalk line between them. Do the same for the other two walls. Where the lines cross is your center.
- Check that the center lines are square to each other using the 3-4-5 method: measure 3 feet along one line from the intersection, 4 feet along the other, and the diagonal between those points should be exactly 5 feet. If it's not, adjust.
- Dry-lay a row of tiles along each chalk line (don't peel the backing yet) from the center toward each wall. This tells you how wide the cut tiles at the walls will be.
Here's the worked example from my 10×12 office. The room is 120 inches by 144 inches. Tiles are 24 inches. From center (60 inches from each short wall), a full row toward the wall fits 2 full tiles (48 inches) with 12 inches left over — meaning the border tiles get cut to 12 inches wide. That's a clean, symmetrical layout: full tiles in the middle, equal 12-inch cuts on both sides. If the leftover had been something awkward like 3 inches, I would have shifted the starting line by half a tile (12 inches) to get two 15-inch cuts instead. Slivers under 6 inches look bad and peel easily, so always shift the layout to avoid them.
Step 3: Lay the Tiles
- Peel the backing paper off the first tile. Start at the center intersection, aligning two edges of the tile with your chalk lines. Press it down firmly, working from the center of the tile outward to push out air.
- Lay the second tile tight against the first — edges touching, no gaps, but don't force them so hard they buckle. Carpet tile edges should just kiss.
- Work outward from the center in a pyramid or stair-step pattern: lay tiles along one chalk line first, then fill in the rows. This keeps everything aligned to your square reference lines instead of drifting.
- Pay attention to tile direction. Most carpet tiles have an arrow on the back indicating pile direction. For a uniform look, keep all arrows pointing the same way. For a checkerboard effect (which hides seams beautifully), rotate every other tile 90 degrees. I did the checkerboard in my office with a two-tone tile and it looks fantastic — the seams essentially disappear. Decide before you start and stay consistent.
I can lay about 40–50 square feet per hour at a comfortable pace once I'm rolling. A 120 sq ft room is genuinely a 3-hour job plus prep.
Step 4: Cut Tiles for Edges and Obstacles
Cutting is where the utility knife earns its keep:
- For a wall edge: flip a loose tile face-down, slide it against the wall so it overlaps the last full tile, and mark the overlap line on the back. Score along the mark with the knife and straightedge, then bend the tile to snap it — or just cut clean through. Always cut from the back; cutting from the face frays the fibers.
- Change blades often. A dull blade drags and leaves ragged edges. I go through a blade every 8–10 cuts. Blades are cheap; crooked tiles are forever.
- For door jambs and corners: make a paper template first. I trace the shape onto a piece of cardboard, test-fit it, then transfer to the tile. My first attempt at cutting around a door jamb freehand wasted two tiles. The template method worked on the first try.
- For floor vents: lay the tile over the vent, feel for the edges through the carpet, and cut an X from corner to corner of the vent opening, then trim the flaps. Remove the vent cover first and reinstall it over the tile when done.
Leave a small gap — about 1/8 inch — between the cut tile edge and the wall. Carpet tiles don't expand like laminate, so this isn't about expansion; it's just so the edge doesn't buckle against the baseboard. The baseboard or quarter-round covers the gap.
Step 5: Roll and Finish
- Once all tiles are down, roll the entire floor with a 75–100 lb floor roller if you can rent one (about $15–$20 for 4 hours at a home center). This seats the adhesive properly. I skipped the roller on my first room and hand-pressed everything; the roller on the second room gave noticeably better adhesion at the edges. If you can't get a roller, walk every tile firmly, pressing edges with your full weight.
- Reinstall baseboards or quarter-round over the tile edges. This hides your cut edges and prevents them from catching.
- Save your spare tiles. Write the brand, color name, and purchase date on the back of one spare with a marker and store them flat in a closet.
Peel-and-Stick vs. Glue-Down vs. Loose-Lay: Quick Comparison
| Feature | Peel-and-Stick | Glue-Down (trowel adhesive) | Loose-Lay / Interlocking |
|---|---|---|---|
| DIY difficulty | Easiest | Moderate (messy, unforgiving) | Easy |
| Can reposition after placing | Yes (first few minutes) | No | Yes, anytime |
| Best for | Bedrooms, offices, basements | Commercial, high-traffic | Rentals, temporary |
| Removal | Moderate — adhesive residue possible | Hard — often damages subfloor | Easy — just pick up |
| Cost per sq ft (materials) | $0.40–$1.00 | $0.50–$1.20 + adhesive | $0.80–$1.50 |
For a home bedroom or office, peel-and-stick is the sweet spot: easy enough for a first-timer, permanent enough to feel like real flooring.
Common Mistakes
1. Starting in a corner instead of the center. My first room drifted almost an inch off by the far wall because the "square" corner wasn't. Center-out with chalk lines is the only way.
2. Skipping subfloor prep. Dust, in my case on concrete, killed the adhesion on two tiles within a month. Sweep, vacuum, mop, dry, and prime bare concrete. The whole prep takes an hour and prevents the only real failure mode of this product.
3. Cutting from the face of the tile. Always cut from the back. The knife glides through the backing cleanly; cutting from the face pulls and frays the carpet fibers, leaving a fuzzy edge that shows at every seam.
4. Not buying the 10% overage. I needed 30 tiles mathematically for my office and bought exactly 30 the first time I priced it out. Then I miscut two around a floor vent and had to drive back to the store — where the dye lot had changed and the new tiles were a shade off. Buy 33–34 for a 120 sq ft room and keep spares.
5. Ignoring pile direction. Half my first row had arrows pointing one way and half the other because I wasn't checking. In solid-color tile, mixed pile direction shows as visible shading differences — it looks like you used two different carpets. Check the arrow on every single tile.
FAQ
1. How long do peel-and-stick carpet tiles last? In a residential bedroom or office, 5–10 years is realistic. The carpet fiber wears before the adhesive fails, in my experience. High-traffic commercial areas get 3–5 years. The nice thing is that worn tiles can be replaced individually — that's the whole point of tile versus wall-to-wall.
2. Can I install peel-and-stick carpet tiles over concrete? Yes — basements and slab-on-grade rooms are actually ideal, since the tiles add warmth over cold concrete. The critical step is the moisture check (tape plastic down for 48 hours) and a coat of primer if the concrete is dusty. If the moisture test shows active water coming through, fix the water problem first; no adhesive flooring survives that.
3. Will peel-and-stick tiles damage the floor underneath? Possibly, on removal. The pressure-sensitive adhesive usually comes up cleanly from concrete and old vinyl, but it can pull finish off hardwood or leave residue that needs adhesive remover. If you're installing over a nice wood floor in a rental, loose-lay interlocking tiles are the safer choice.
4. Can I use peel-and-stick carpet tiles in a bathroom? I wouldn't. Bathrooms have standing water, steam, and humidity swings that break down the adhesive and grow mold under the tiles. Use vinyl plank or tile in bathrooms. Carpet tiles are great for bedrooms, offices, basements, playrooms, and closets — anywhere that stays dry.
5. How do I replace a single damaged tile? Heat helps: warm the tile with a hair dryer for 30–60 seconds to soften the adhesive, then work a putty knife under one corner and peel slowly. Clean any residue with adhesive remover, let it dry, and press the new tile in. This is why you saved spares from the same dye lot — a new tile from a different lot will be visibly off.
About the Author
Dave Collins is a hands-on DIY enthusiast who has spent the past 15 years renovating three of his own homes. He learned most of what he knows by making mistakes first, then asking pros what he did wrong. On this site he writes practical, numbers-first guides so you can skip the mistakes and get it right the first time.