
Early in my DIY career I tried to drill a hole through a steel bracket with a spade bit meant for wood. The bit skated across the metal, chewed up the surface, and snapped — and I stood there holding a broken bit and a scratched bracket, no smarter than when I started. The lesson stuck: the bit matters as much as the drill. This guide covers the bits I actually reach for, what each one does, and how to match the bit to the material so you don't learn the hard way like I did.
How Drill Bits Are Categorized
Most bits you'll encounter fall into one of five families, and each family has a material it's built for. Using a wood bit on metal or a metal bit on masonry isn't just slow — it destroys the bit and can damage the workpiece.
The Five Bits Every DIYer Should Own
1. Twist bits (metal and general purpose)
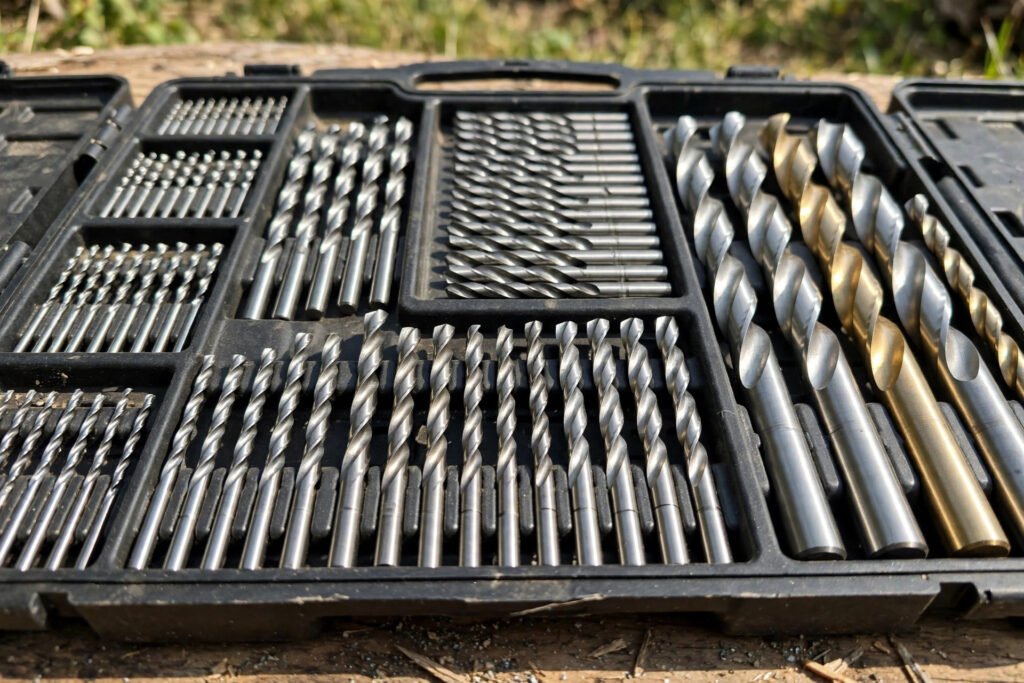
The classic spiral bit. A set of high-speed steel (HSS) twist bits from 1/16" to 1/2" handles metal, plastic, and most drilling in wood if you don't own wood-specific bits. For harder metals like stainless steel, step up to cobalt bits — they hold an edge far longer.
My rule: if you're drilling metal, use cutting oil. A few drops keep the bit cool and double its life. Drilling dry into steel kills bits fast — the heat ruins the temper of the cutting edge.
2. Brad-point bits (wood)
These look like twist bits but have a sharp center point and spurs on the cutting edges. The point keeps the bit from wandering on the wood surface, and the spurs cut clean entry holes with minimal tear-out. If you drill a lot of holes in wood — shelf pin holes, pilot holes, dowel holes — brad-point bits are noticeably cleaner than twist bits.
3. Spade bits (wood, fast and rough)
Flat paddle-shaped bits for drilling larger holes (1/2" to 1-1/2") in wood quickly. They're the bit I reach for when drilling through studs for wiring or running cable. The holes are rough and the bit can blow out the back of the board, so clamp a scrap board behind your workpiece when appearance matters.
4. Forstner bits (wood, clean flat-bottomed holes)
Forstner bits cut flat-bottomed holes with glassy-smooth walls — the right tool for hinge cups, dowel holes, and anywhere the hole itself is part of the finished look. They require a drill press or a very steady hand with a handheld drill at low speed. I use mine mostly for European-style cabinet hinges and furniture repairs.
5. Masonry bits (concrete, brick, stone)
These have a carbide tip brazed onto a steel body and are designed to be used with hammer action. You can use them in a regular drill for soft brick or mortar, but for concrete you want a hammer drill or rotary hammer. The carbide tip does the cutting; the flutes just clear the dust.
Material-to-Bit Decision Table
This is the chart I wish someone had handed me on day one. Find your material, grab the right bit.
| Material | Best bit | Drill mode | Speed | Pro tip |
|---|---|---|---|---|
| Softwood (pine, cedar) | Brad-point or spade | Normal | Fast | Back up the exit side to prevent blowout |
| Hardwood (oak, maple) | Brad-point or Forstner | Normal | Medium | Pre-drill to avoid splitting; go slow near the exit |
| Plywood | Brad-point | Normal | Fast | Score the entry with a knife to reduce splintering |
| MDF / particle board | Brad-point or twist | Normal | Fast | Dust is abrasive — bits dull faster |
| Mild steel / aluminum | HSS twist or cobalt | Normal | Slow | Use cutting oil; center-punch the mark first |
| Stainless steel | Cobalt twist | Normal | Very slow | High pressure, low speed; never let it spin without cutting |
| Plastic / acrylic | Twist (dull edge) | Normal | Slow | Back off the pressure — bits grab and crack acrylic |
| Ceramic tile | Diamond or carbide tile bit | Normal | Slow | Use water to cool; tape the surface to prevent chipping |
| Brick / mortar | Masonry bit | Hammer if available | Medium | Start without hammer mode to seat the bit |
| Concrete / block | Masonry bit (carbide) | Hammer drill | Medium | Clear dust often; depth stop helps |
| Drywall | Twist or spade | Normal | Fast | Anything works — drywall is soft |
| Glass | Diamond bit | Normal | Very slow | Constant water cooling; light pressure |
Drill Bit Sizes: What Actually Matters
Bits are sized by diameter, and the size you need is usually dictated by the fastener:
- Pilot holes in wood: use a bit slightly smaller than the screw's shaft (not the threads). For a #8 wood screw, a 7/64" pilot bit is about right. The screw threads need wood to bite into — too big a pilot hole and the screw strips out.
- Clearance holes: when a bolt passes through a piece without threading into it, drill the hole 1/16" larger than the bolt diameter.
- Countersinking: drill the pilot hole first, then use a countersink bit to cut the cone-shaped recess so the screw head sits flush.
A full fractional set from 1/16" to 1/2" in 1/64" steps covers nearly every DIY job. I bought a decent 29-piece HSS set for about $30 fifteen years ago and still use it weekly.
Speed and Pressure: The Two Things Beginners Get Wrong
This is where bits die. The general rule: hard material = slow speed + firm pressure; soft material = fast speed + light pressure.
- Drilling steel at high speed with light pressure just rubs the bit against the metal, generating heat and zero progress. Slow down, push harder, use oil.
- Drilling wood at very slow speed with heavy pressure tears fibers and gives you a ragged hole. Speed up, ease off.
Most cordless drills have a 2-speed gearbox. Use speed 1 (low) for metal and large bits, speed 2 (high) for wood and small bits. If your drill has variable speed on the trigger, feather it until chips are coming off steadily.
Hole Saws vs. Forstner vs. Spade: Large Holes Compared
| Bit type | Size range | Hole quality | Speed | Best for |
|---|---|---|---|---|
| Spade bit | 1/2"–1-1/2" | Rough | Fast | Rough holes through studs, joists |
| Hole saw | 3/4"–6" | Medium | Medium | Doorknob holes, recessed lights, pipe pass-throughs |
| Forstner bit | 1/4"–2-1/8" | Excellent, flat bottom | Slow | Hinge cups, dowels, visible holes |
| Self-feed / auger bit | 1/2"–1-1/2" | Medium | Very fast | Deep holes in framing lumber |
For doorknob installation, a 2-1/8" hole saw plus a 1" spade bit for the latch is the standard combination. Most lockset kits include a template.
Sharpening and Bit Care
A dull bit is a dangerous bit — you push harder, it wanders, and it can snap. Signs a twist bit is dull: it squeals instead of cutting, produces dust instead of chips in wood, or takes noticeably longer than it used to.
- Twist bits can be sharpened with a bench grinder or a dedicated drill sharpener. I sharpen mine a few times a year.
- Spade bits can be touched up with a small file on the cutting edges.
- Masonry and carbide bits are effectively disposable for homeowners — sharpening carbide requires diamond wheels. When they're done, replace them.
- Storage matters. Bits rattling around loose in a drawer chip each other's cutting edges. Keep them in the indexed case they came in.
A Real Example: Drilling Into a Concrete Foundation Wall
Last fall I mounted a hose reel to my poured concrete foundation. Here's what worked:
- Bit: 5/32" carbide masonry bit (for 3/16" Tapcon screws — Tapcon packaging specifies the exact bit size, and it's not a suggestion).
- Drill: hammer drill on hammer mode. I tried my regular drill first on hammer-less mode and made about 1/8" of progress in two minutes. The hammer drill did each hole in under 30 seconds.
- Depth: 2 inches deep for a 1-3/4" screw — always drill the hole slightly deeper than the screw length so dust doesn't bottom out the screw.
- Cleanup: blew out each hole with a straw (wear eye protection) before driving the screw. Dust in the hole prevents the screw from seating fully.
Six screws, twenty minutes, and the hose reel hasn't moved a millimeter in a year of use.
Common Mistakes
- Using wood bits on metal. The bit dulls instantly, wanders across the surface, and can snap. Match the bit to the material — every time.
- Drilling metal dry. No cutting oil means overheated bits and work-hardened metal that gets harder to drill the longer you fight it.
- No pilot hole for large bits. Trying to drill a 1/2" hole in one pass, especially in metal, is asking for a wandering bit. Step up: 1/8", then 1/4", then 1/2".
- Skipping the center punch on metal. A spring-loaded center punch ($8) puts a dimple exactly where you want the hole. Without it, the bit walks across the surface before it bites.
- Wrong speed. High speed on steel, low speed on wood — both are wrong and both ruin bits. Hard = slow, soft = fast.
- Drilling through without backing. The bit exits the back of the board and blows out a splintered crater. Clamp a scrap board behind the workpiece for clean exits.
FAQ
What's the difference between HSS and cobalt drill bits? HSS (high-speed steel) handles wood, plastic, and mild steel fine. Cobalt bits are harder and more heat-resistant, so they last much longer in stainless steel and other hard metals. For a homeowner who rarely drills metal, HSS is plenty.
Can I use a masonry bit in a regular drill? For soft brick and mortar, yes. For concrete, you'll want a hammer drill — a regular drill will take many times longer and wear out the bit. The hammer action does most of the work in concrete.
Why does my drill bit keep getting stuck in wood? Usually it's a dull bit combined with too much pressure, or the flutes are clogged with chips. Pull the bit out periodically to clear chips, especially on deep holes. A sharp bit with steady, moderate pressure rarely binds.
Do I need a drill press? Not for most DIY work. A drill press shines for Forstner bits, perfectly perpendicular holes, and repeatable depths. For everything else, a handheld drill with a steady hand works fine.
How do I drill a straight hole without a drill press? Use a drill guide attachment ($15–20) that clamps to your drill, or make a simple jig: drill a perpendicular hole through a block of scrap wood and use it as a guide bushing. Check your angle from two sides as you start the hole.
About the Author
Dave Collins is a hands-on DIY enthusiast who has spent the past 15 years renovating three of his own homes. He learned most of what he knows by making mistakes first, then asking pros what he did wrong. On this site he writes practical, numbers-first guides so you can skip the mistakes and get it right the first time.